The following photos illustrate the various problems that we hope to address and remediate through phase 1 of the Honoring Father Coyle Capital Campaign. There are descriptive captions with each photo. You can click on each photo to enlarge it. Any questions? Email Father Jerabek!
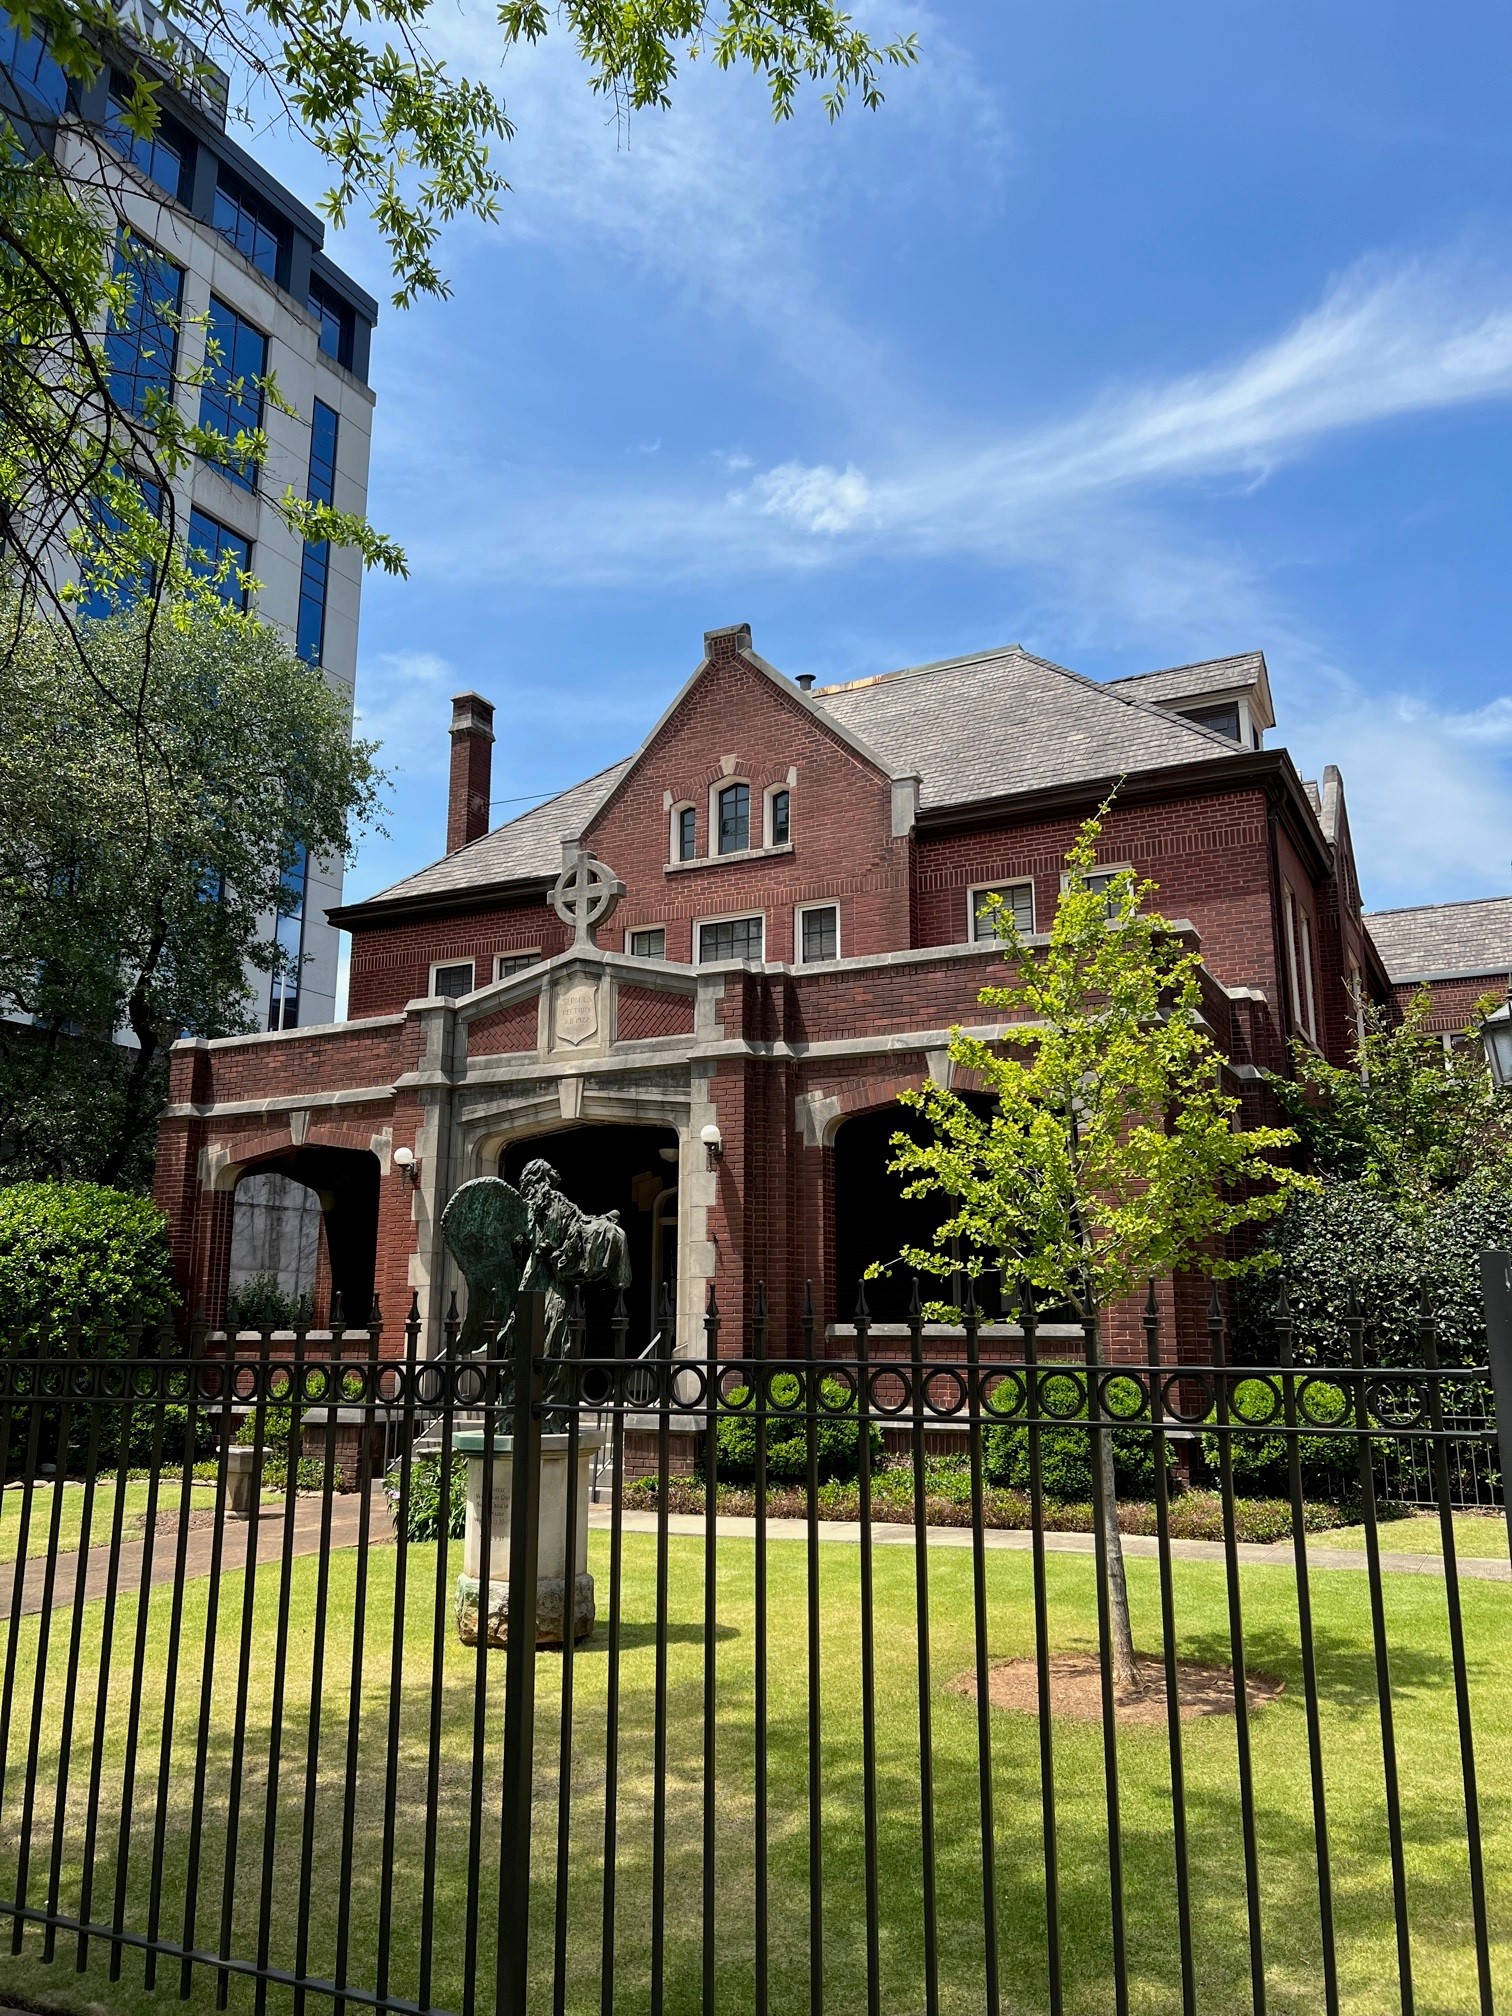
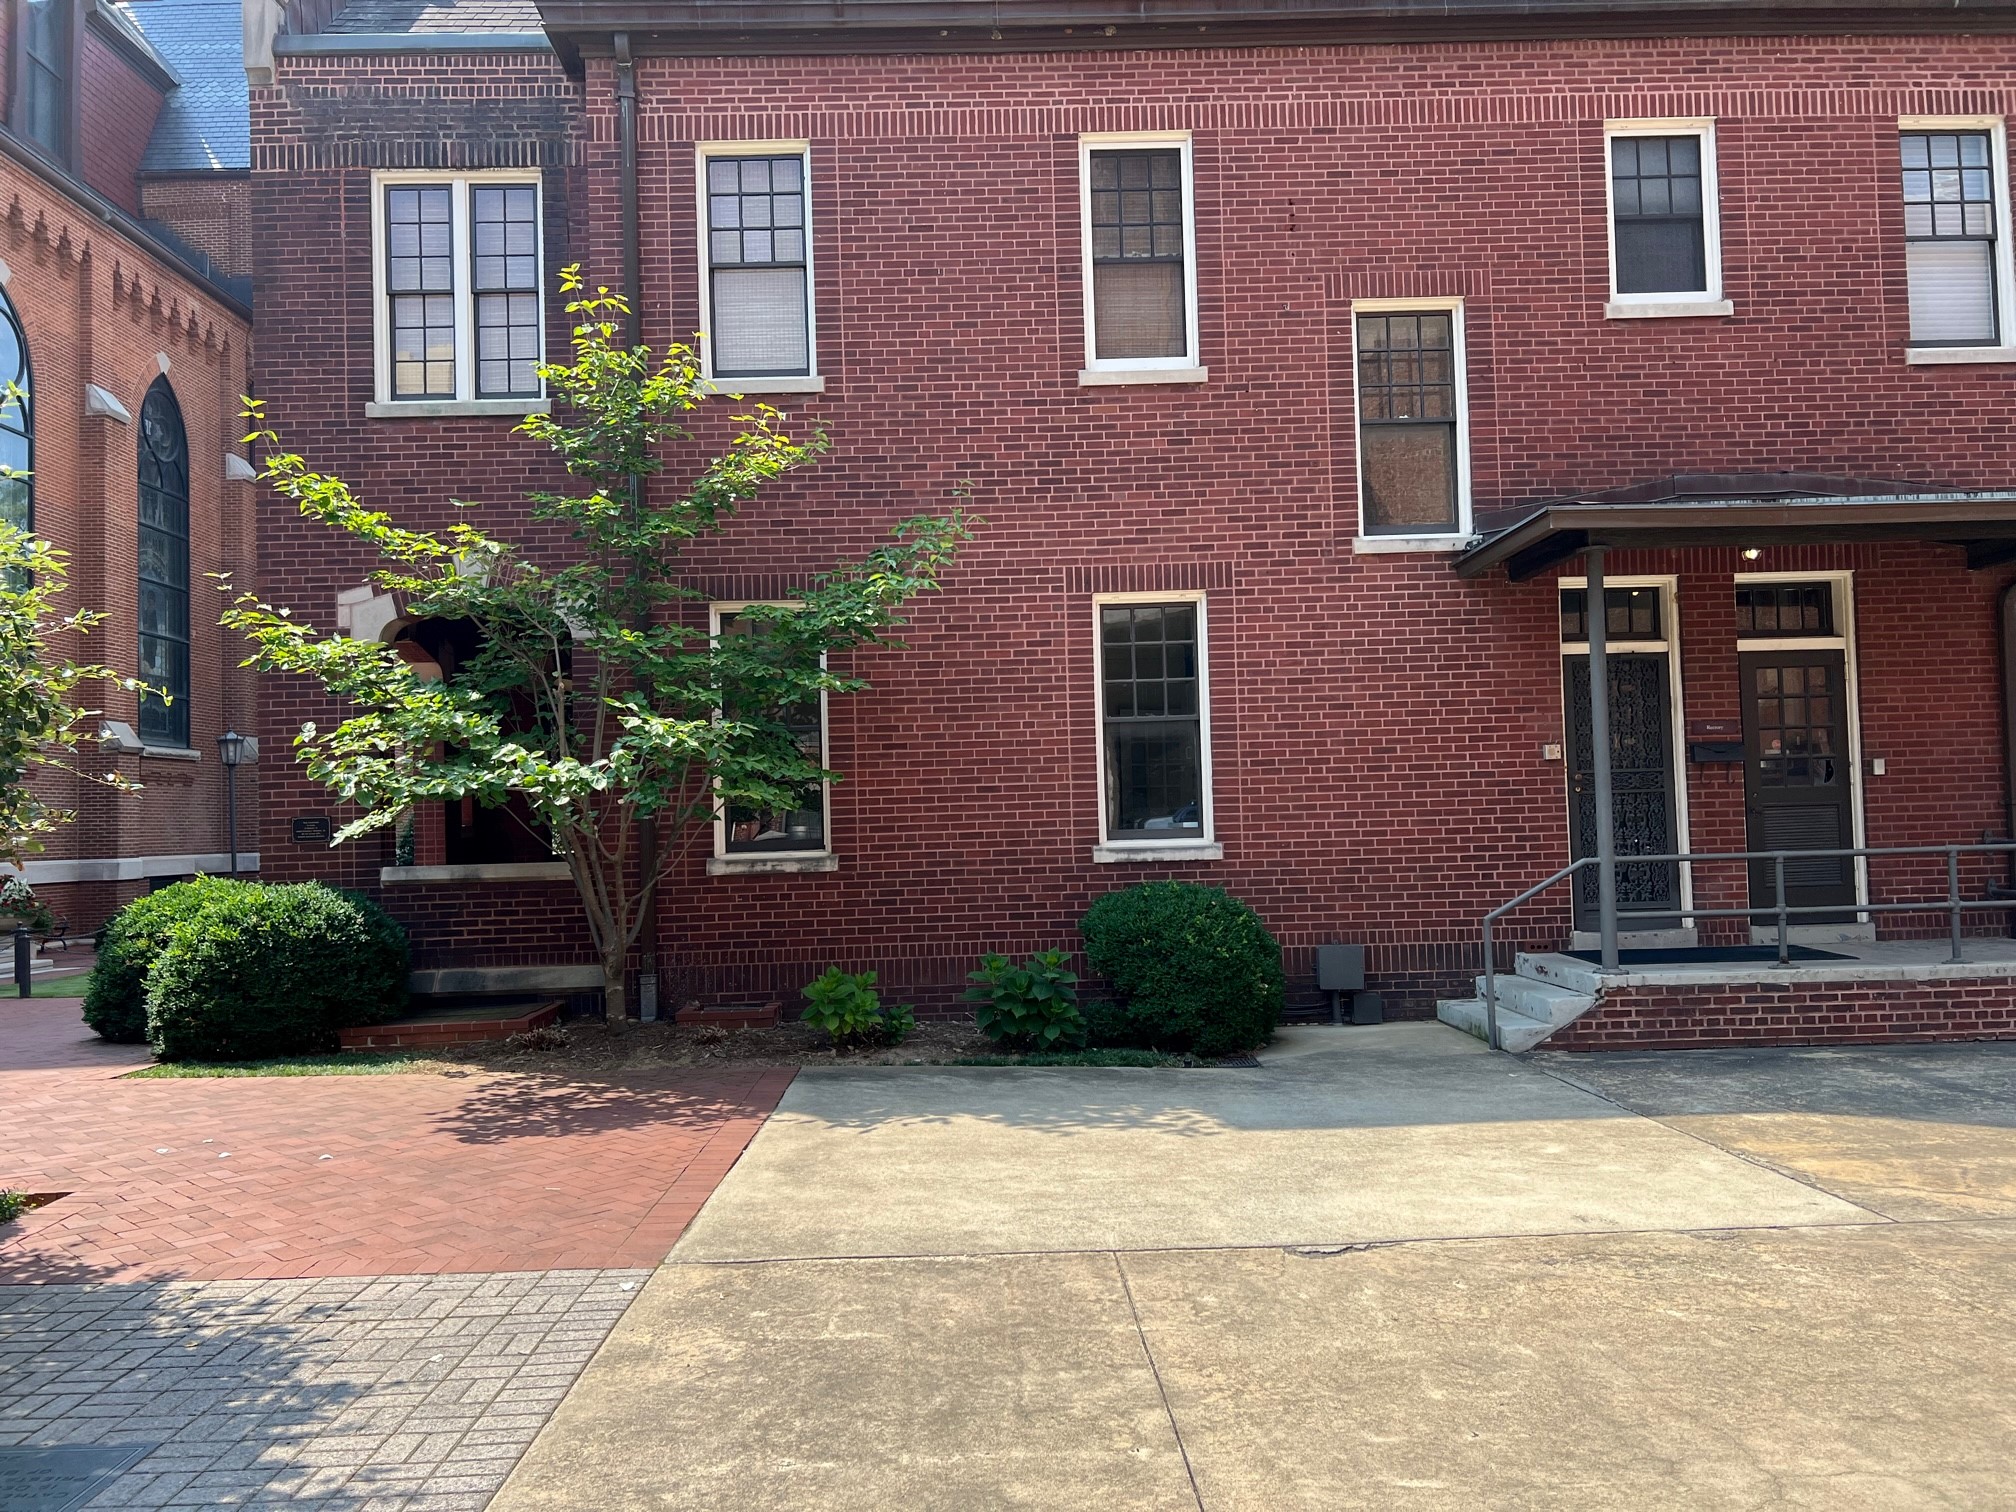
The Rectory was built in 1922 in a red brick style that is complementary with the other buildings on the Cathedral campus. It has three floors and 7,161 occupiable square feet. There is no basement, but a shallow crawl space underneath that is accessible through exterior portals. It is the last free-standing continuously-occupied house in Downtown Birmingham.
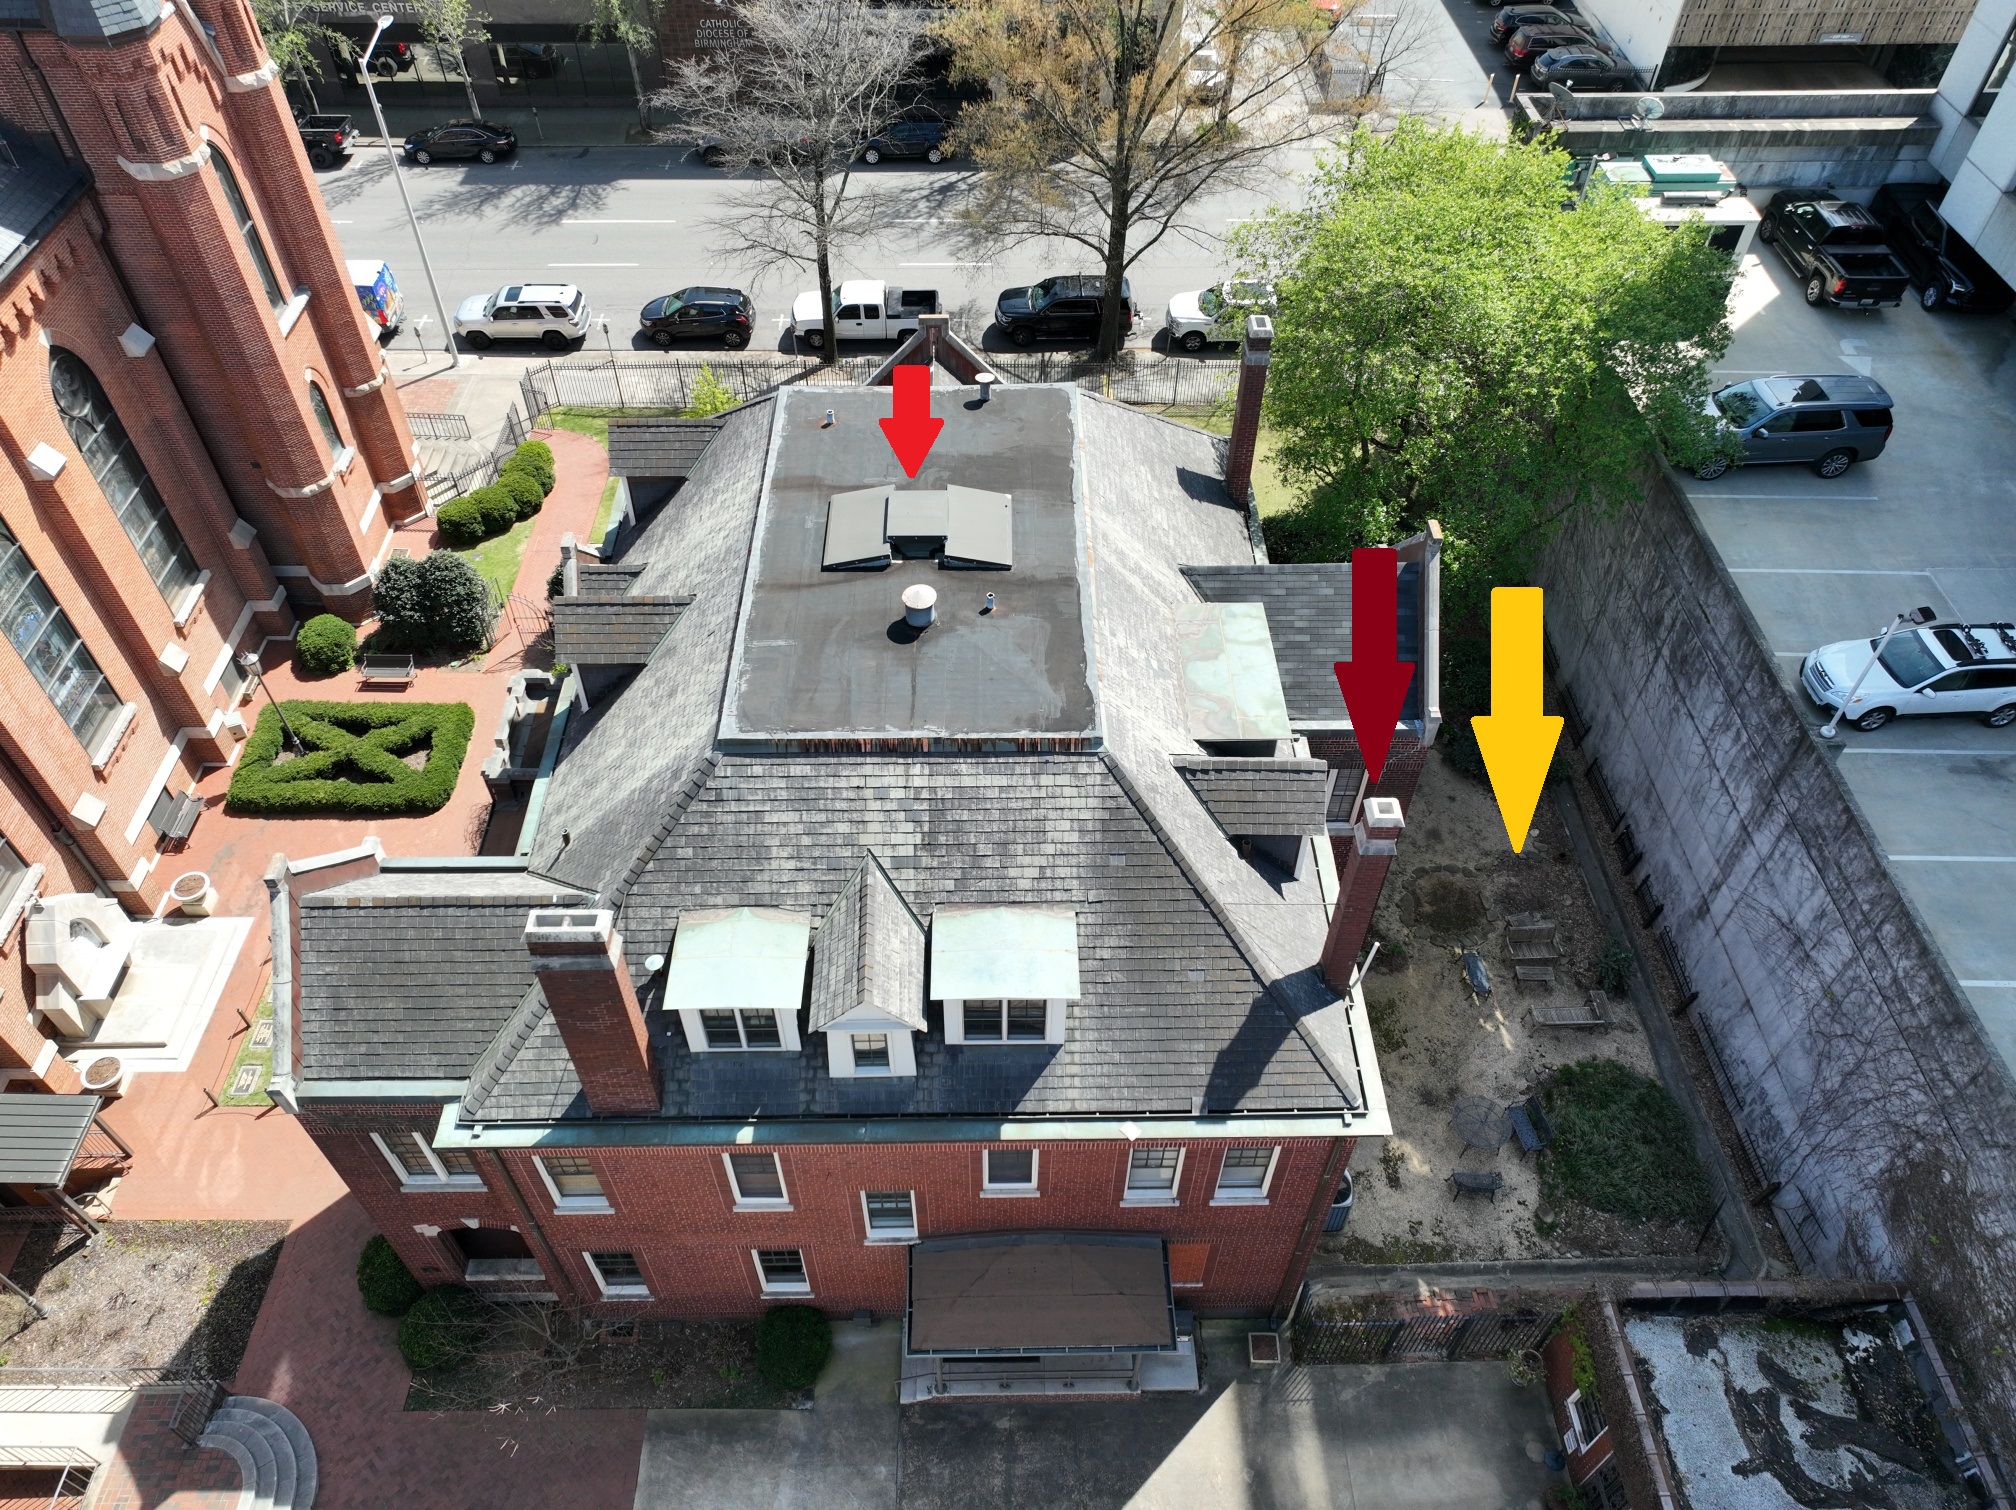
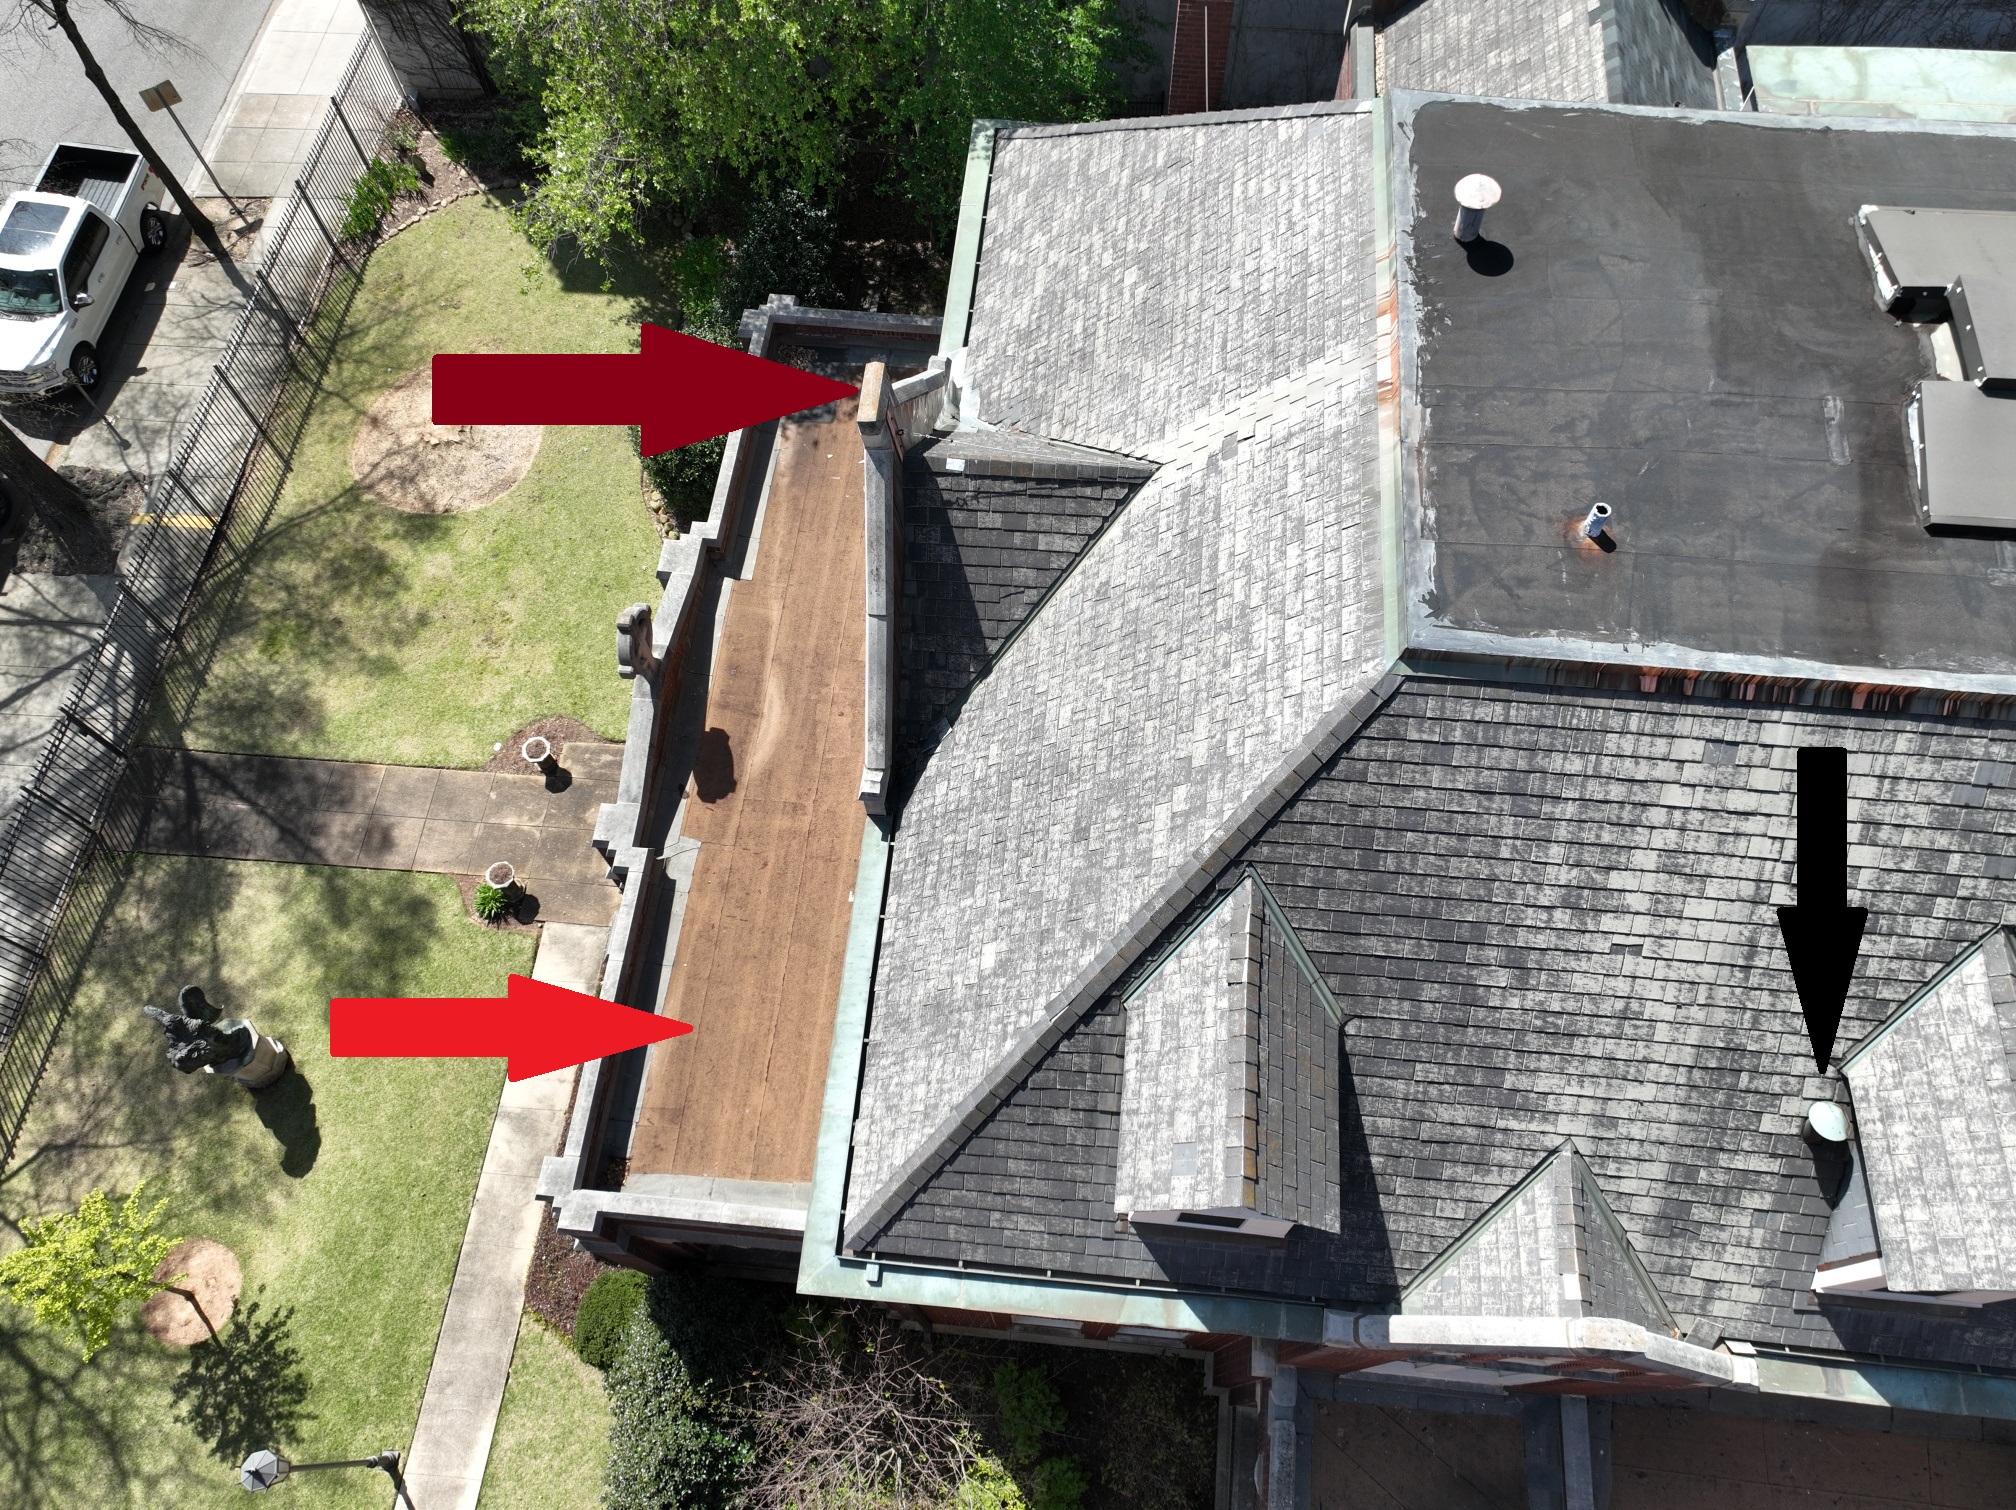
This drone photo gives a general sense of the different roofing surfaces and multiplicity of dormers and protrusions on the Rectory Roof. The four main sides and the two wings are clad with a faux slate product that is disintegrating badly. The top is flat, covered with a tarred membrane which, last year, had a “skim coat” applied to it that would perhaps buy us two more years, to try to mitigate the worst leaks. There is also a sheet metal cover over a former skylight, which rattles during storms and likely lets water in (red arrow). Different dormer styles and some dormers placed very closely together – in several cases, with vent pipes protruding right next to them or between them (see other photos, below) – create a number of water runoff and intrusion issues. The northwest chimney (bottom right – brown arrow) is no longer used and will be demolished. Limestone capping is visible especially on the side wings, front façade, and on the chimneys; there is also such capping along the rooflines of the front and side porches. The side yard (yellow arrow) is where a future driveway exit to Third Avenue North is envisioned; during this project, it will become part of the staging area for the contractor. Please note: an access hatch will be added to the roof to facilitate future maintenance on the flat area (probably where the capped skylight currently is located – red arrow) – the skylight will otherwise be properly and fully removed so that there is no further need for a floppy metal cover to cap it off.
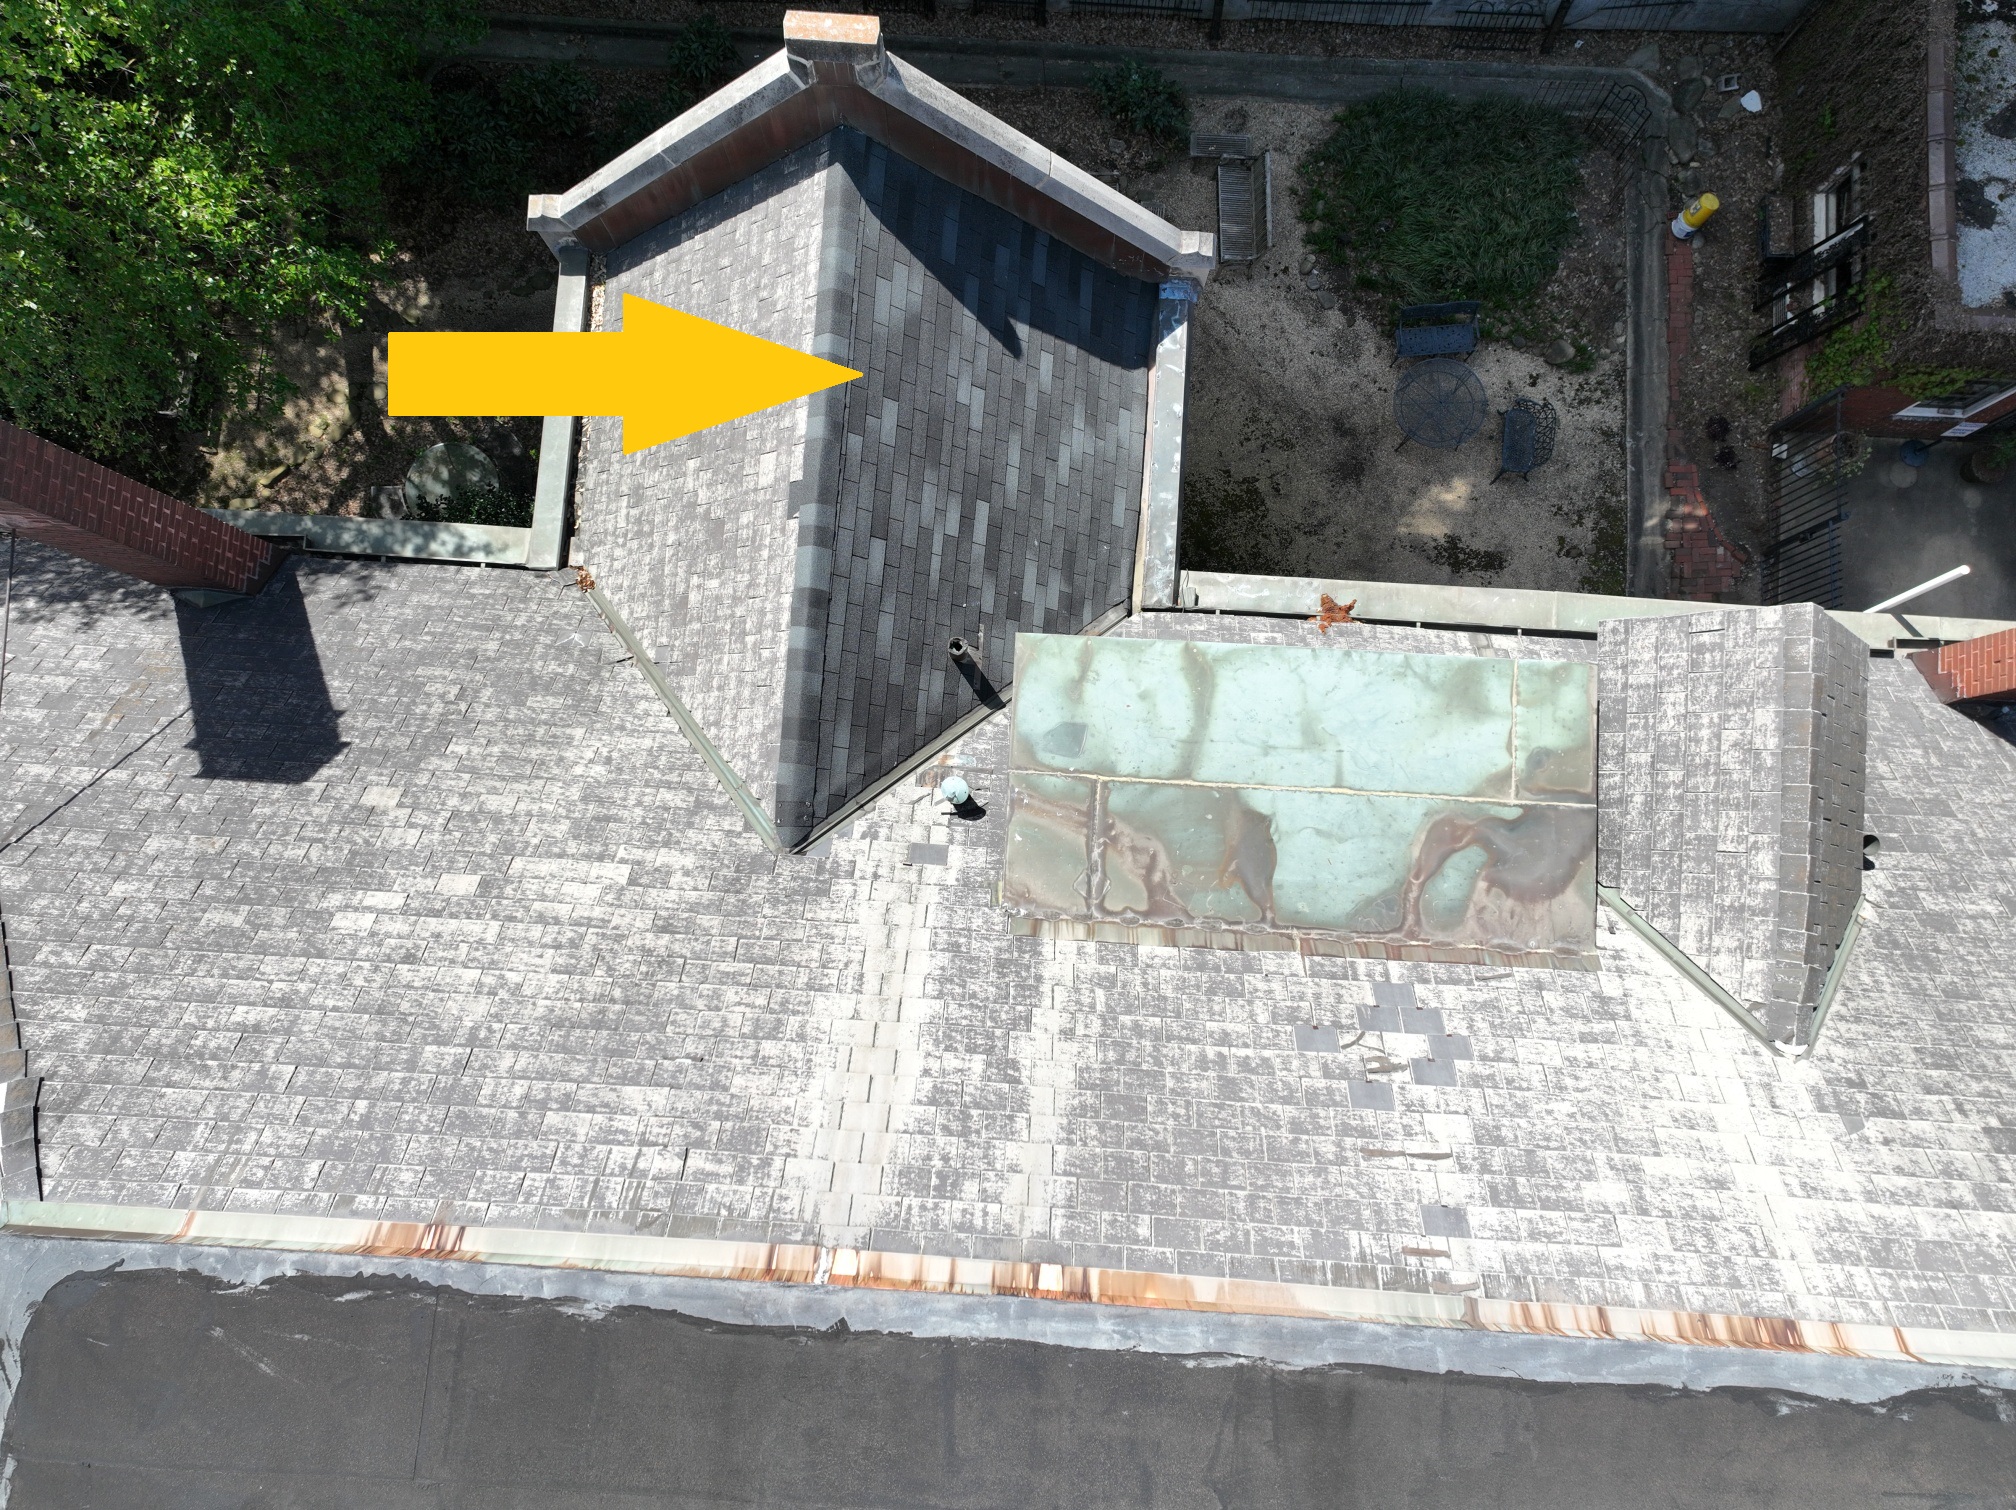
The “west wing” (which, on the first floor, includes part of the formal dining room area) had particularly bad water runoff problems, as well as probable leaks in the internal gutter system. As a result, about two years ago one side of it was re-roofed using an inexpensive asphalt shingle product (yellow arrow), in order to try to prevent further serious water damage on that side of the building. As the photos below show, the damage was already heavily done by that point and, until the wall fully dried out, its full extent would not be revealed.
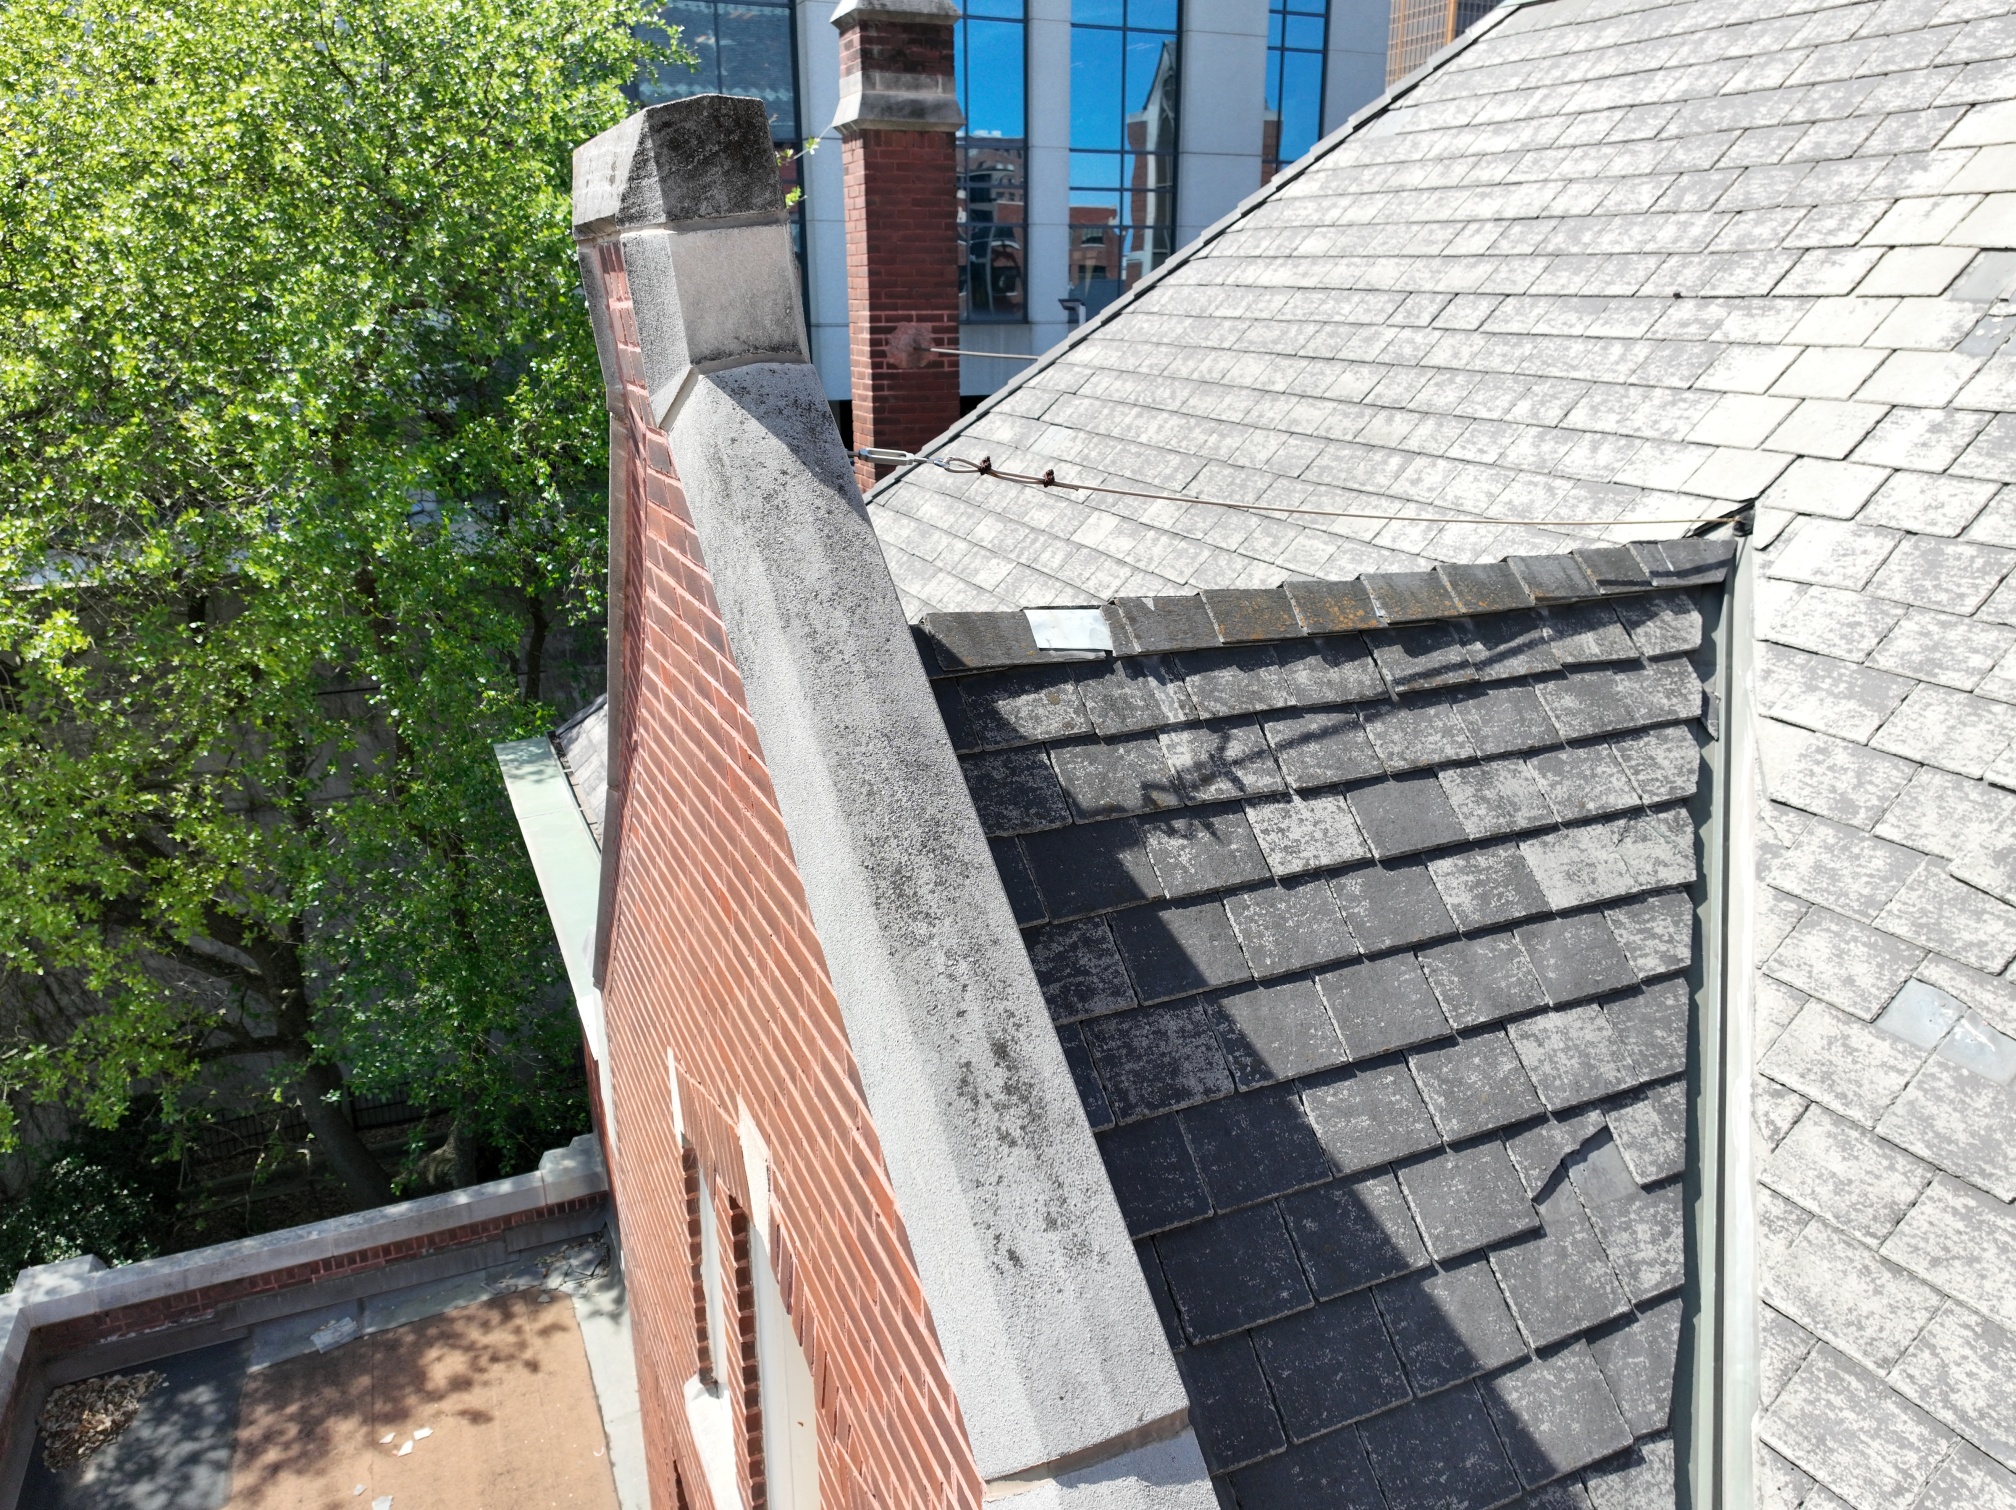
The façade on the front of the house (brown arrow) is leaning and in danger of collapse. A metal cable tries to hold it in place, but the combination of leaning/separation and the entrance of the cable itself into the interior create other water entry-points. The next photo will show perhaps more clearly the leaning of this area. Note also the flat recessed roof on the front porch (red arrow); this type of roof is also on the side porch. These roofs have failed also and water regularly comes inside the porches as a result. On the bottom-right, note the vent pipe that protrudes right up against the dormer (black arrow).
This image shows a little more clearly how the front façade dangerously leans forward – and how it is “secured” with a metal cable.
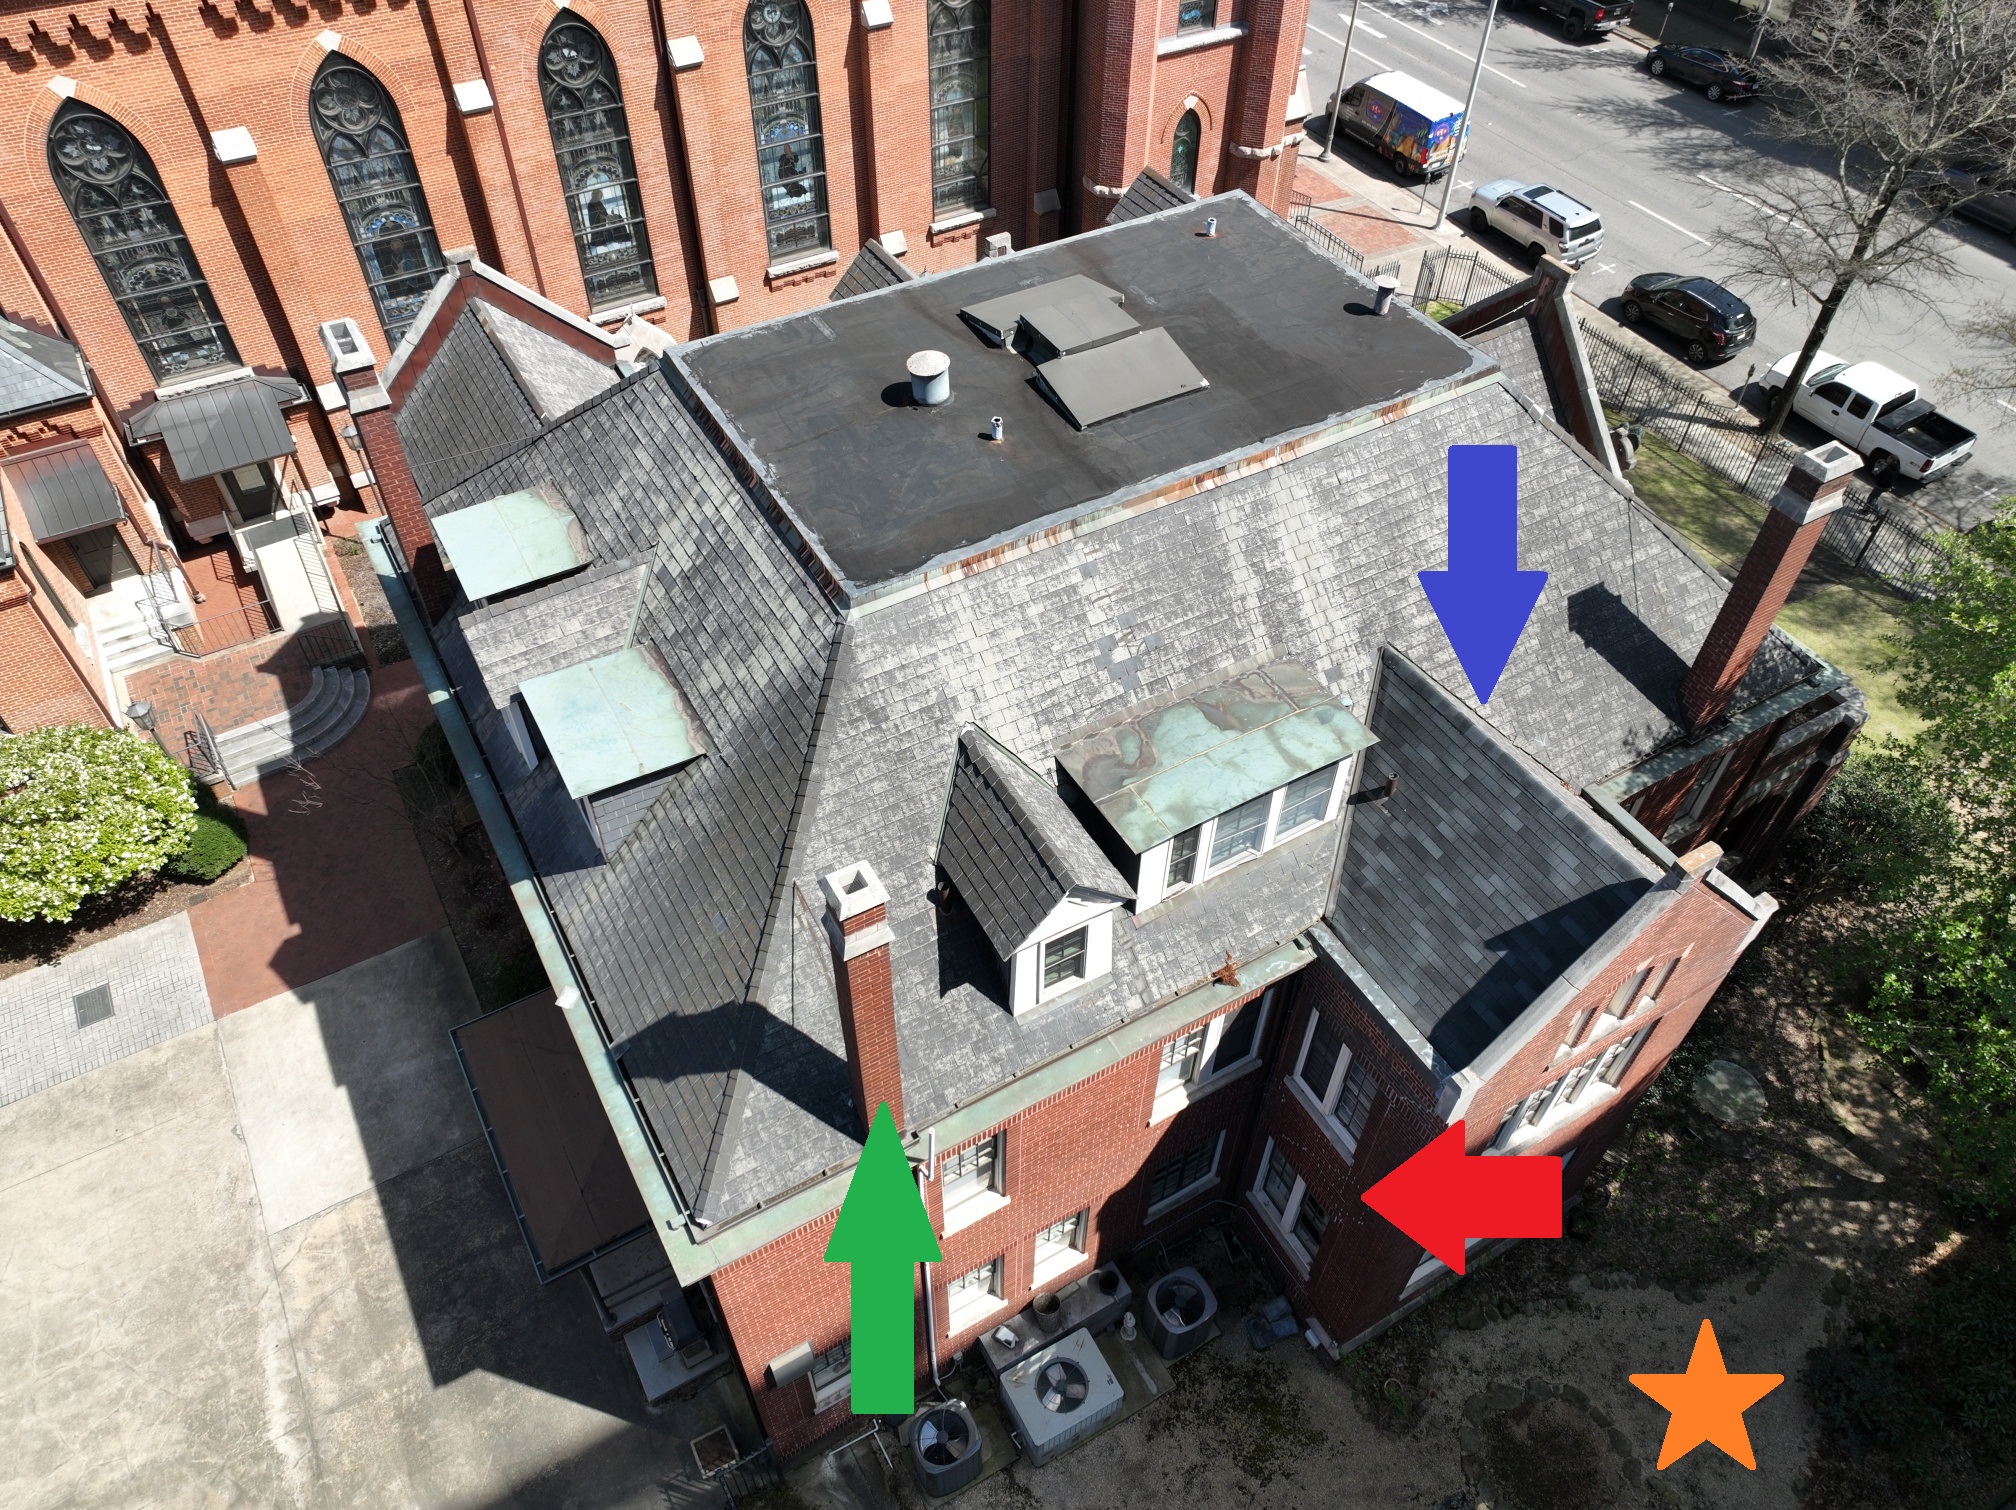
This view from a northwest angle shows in the foreground the long-unused chimney that will be demolished (green arrow), and gives another view of the “west wing” (blue arrow), with its newer asphalt shingles (as described above). If you zoom in, you can see where the brick on that wing was caulked because of the cracking caused by foundation settling and water intrusion (red arrow). Part of Phase 1 of our campaign will include re-pointing of brick in areas like these. The side yard of the rectory (seen bottom-right – orange star) is also partially visible; as noted above, it will become a staging area for the contractor; and, in a future phase, it will become a driveway exit to Third Avenue North.
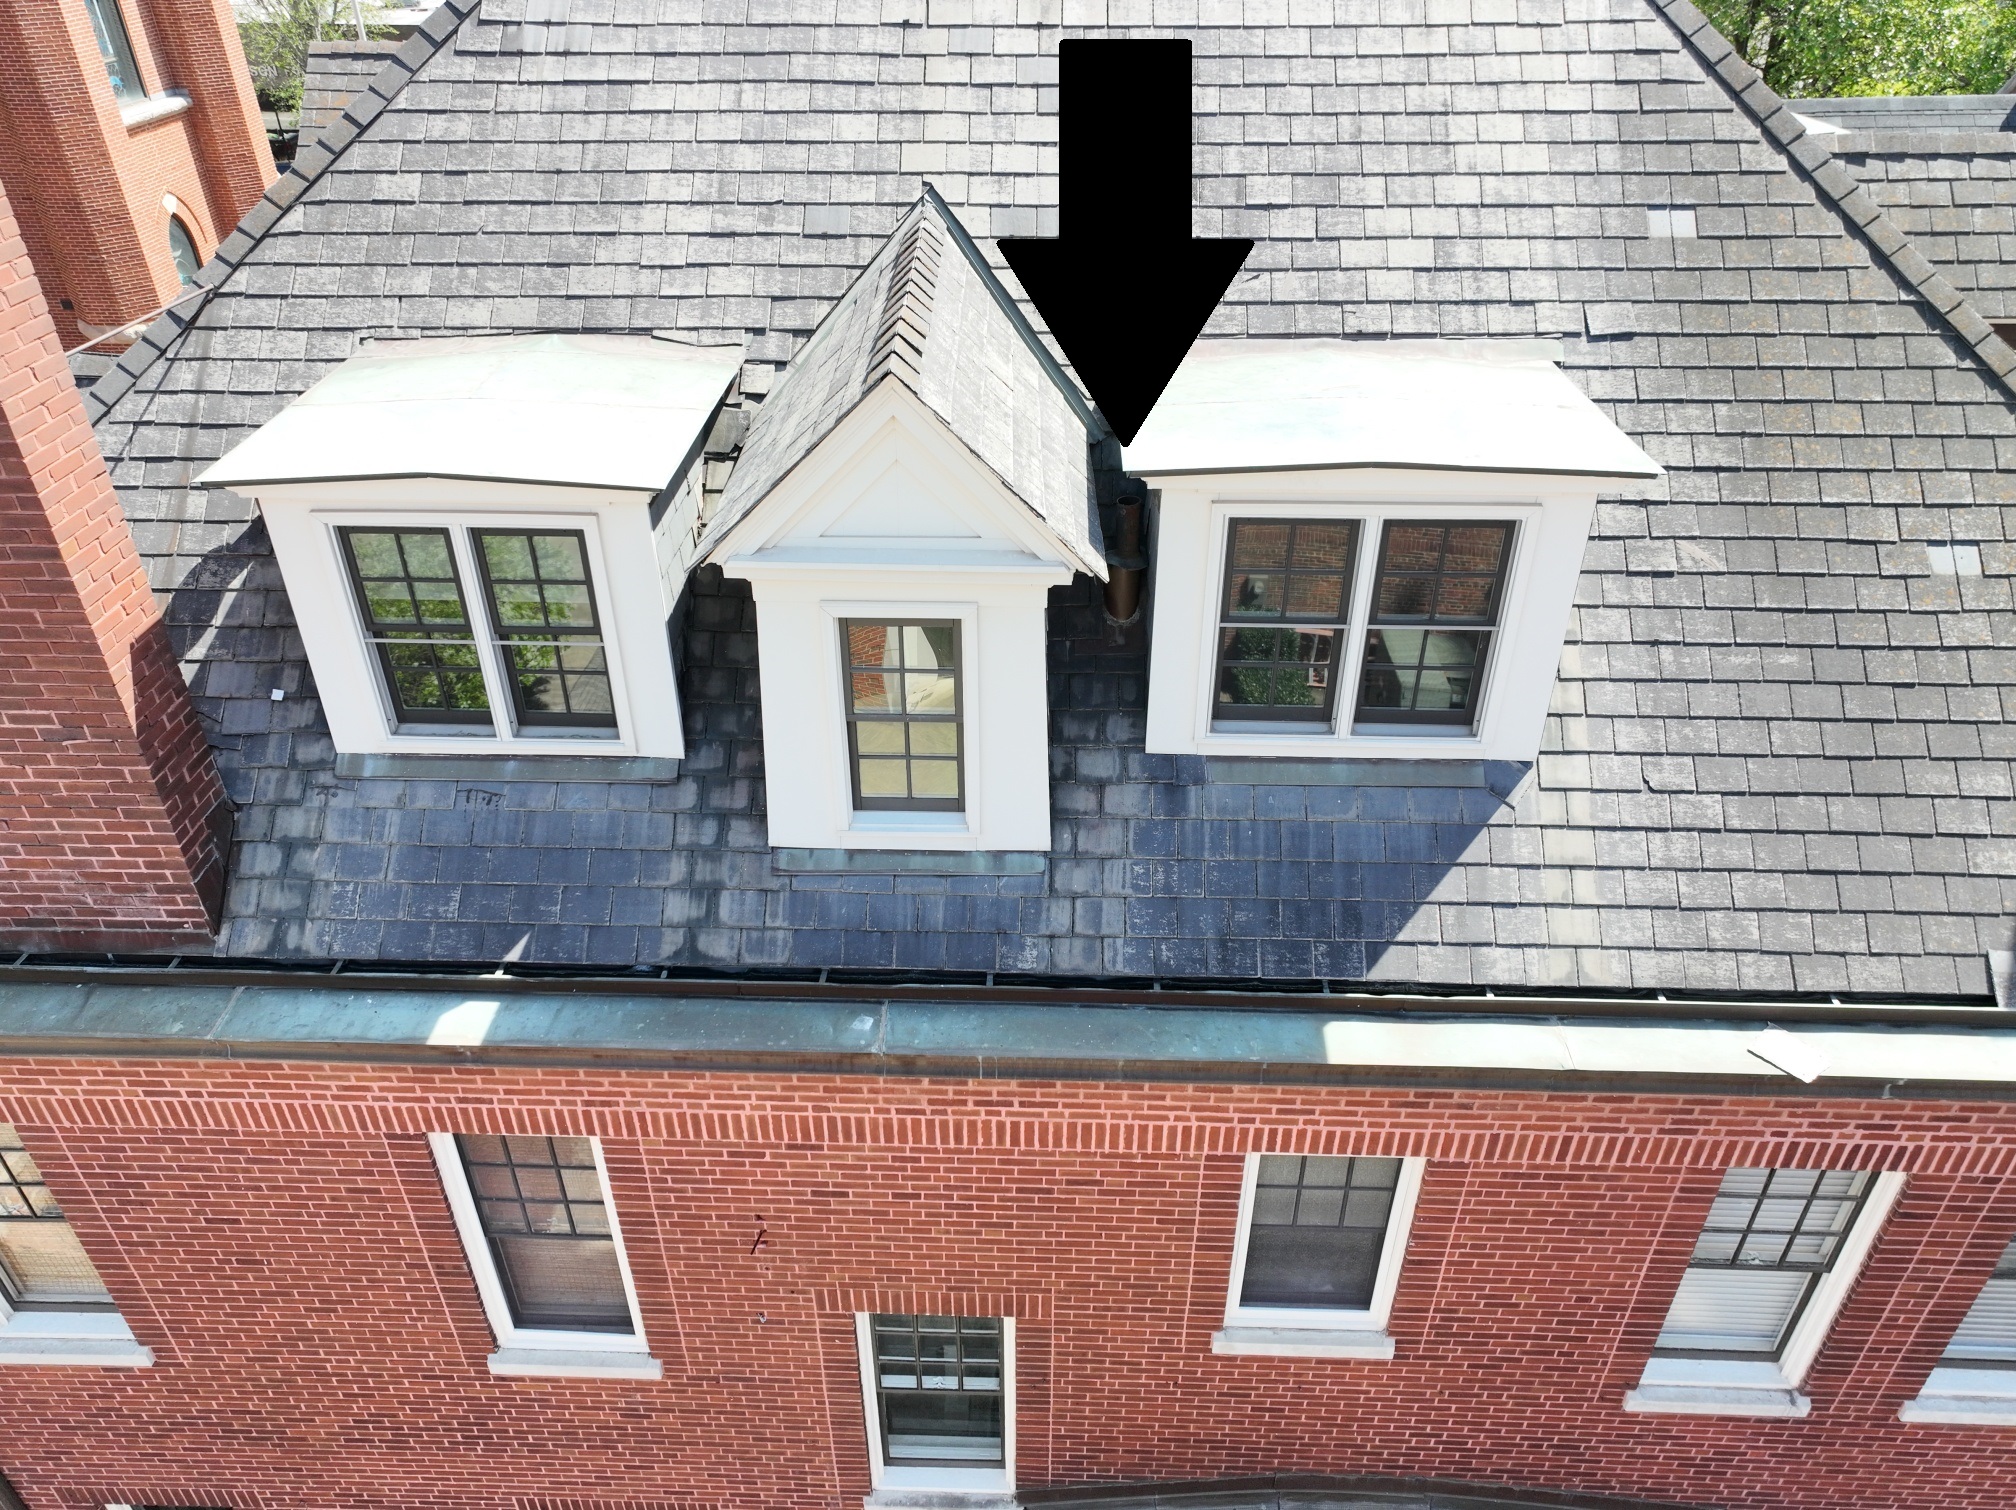
If you zoom in and look closely at the right two dormers (these are on the north side of the house – that is, the driveway side), you can see how a vent pipe is tucked in between them (beneath the black arrow). The dormers are already rather close together, and it is hard to seal the space between them; the pipe being there makes matters worse. A photo below will show the water damage to the ceiling under this area, which is the back staircase. The re-roofing will address issues like this by restructuring the exterior of the dormers and tying them together.
The back door is the main entrance that the residents of the Rectory use (it is the left of the two doors – the one on the right accesses a utility closet). But, like each of the four entrances to the house, it has steps going up to it. The back porch will be modified to raise it to the level of the door’s threshold, put a handicapped-accessible ramp on the left side, and put regular steps on the right side (not pictured – where the BBQ grill now is located, which will go away).
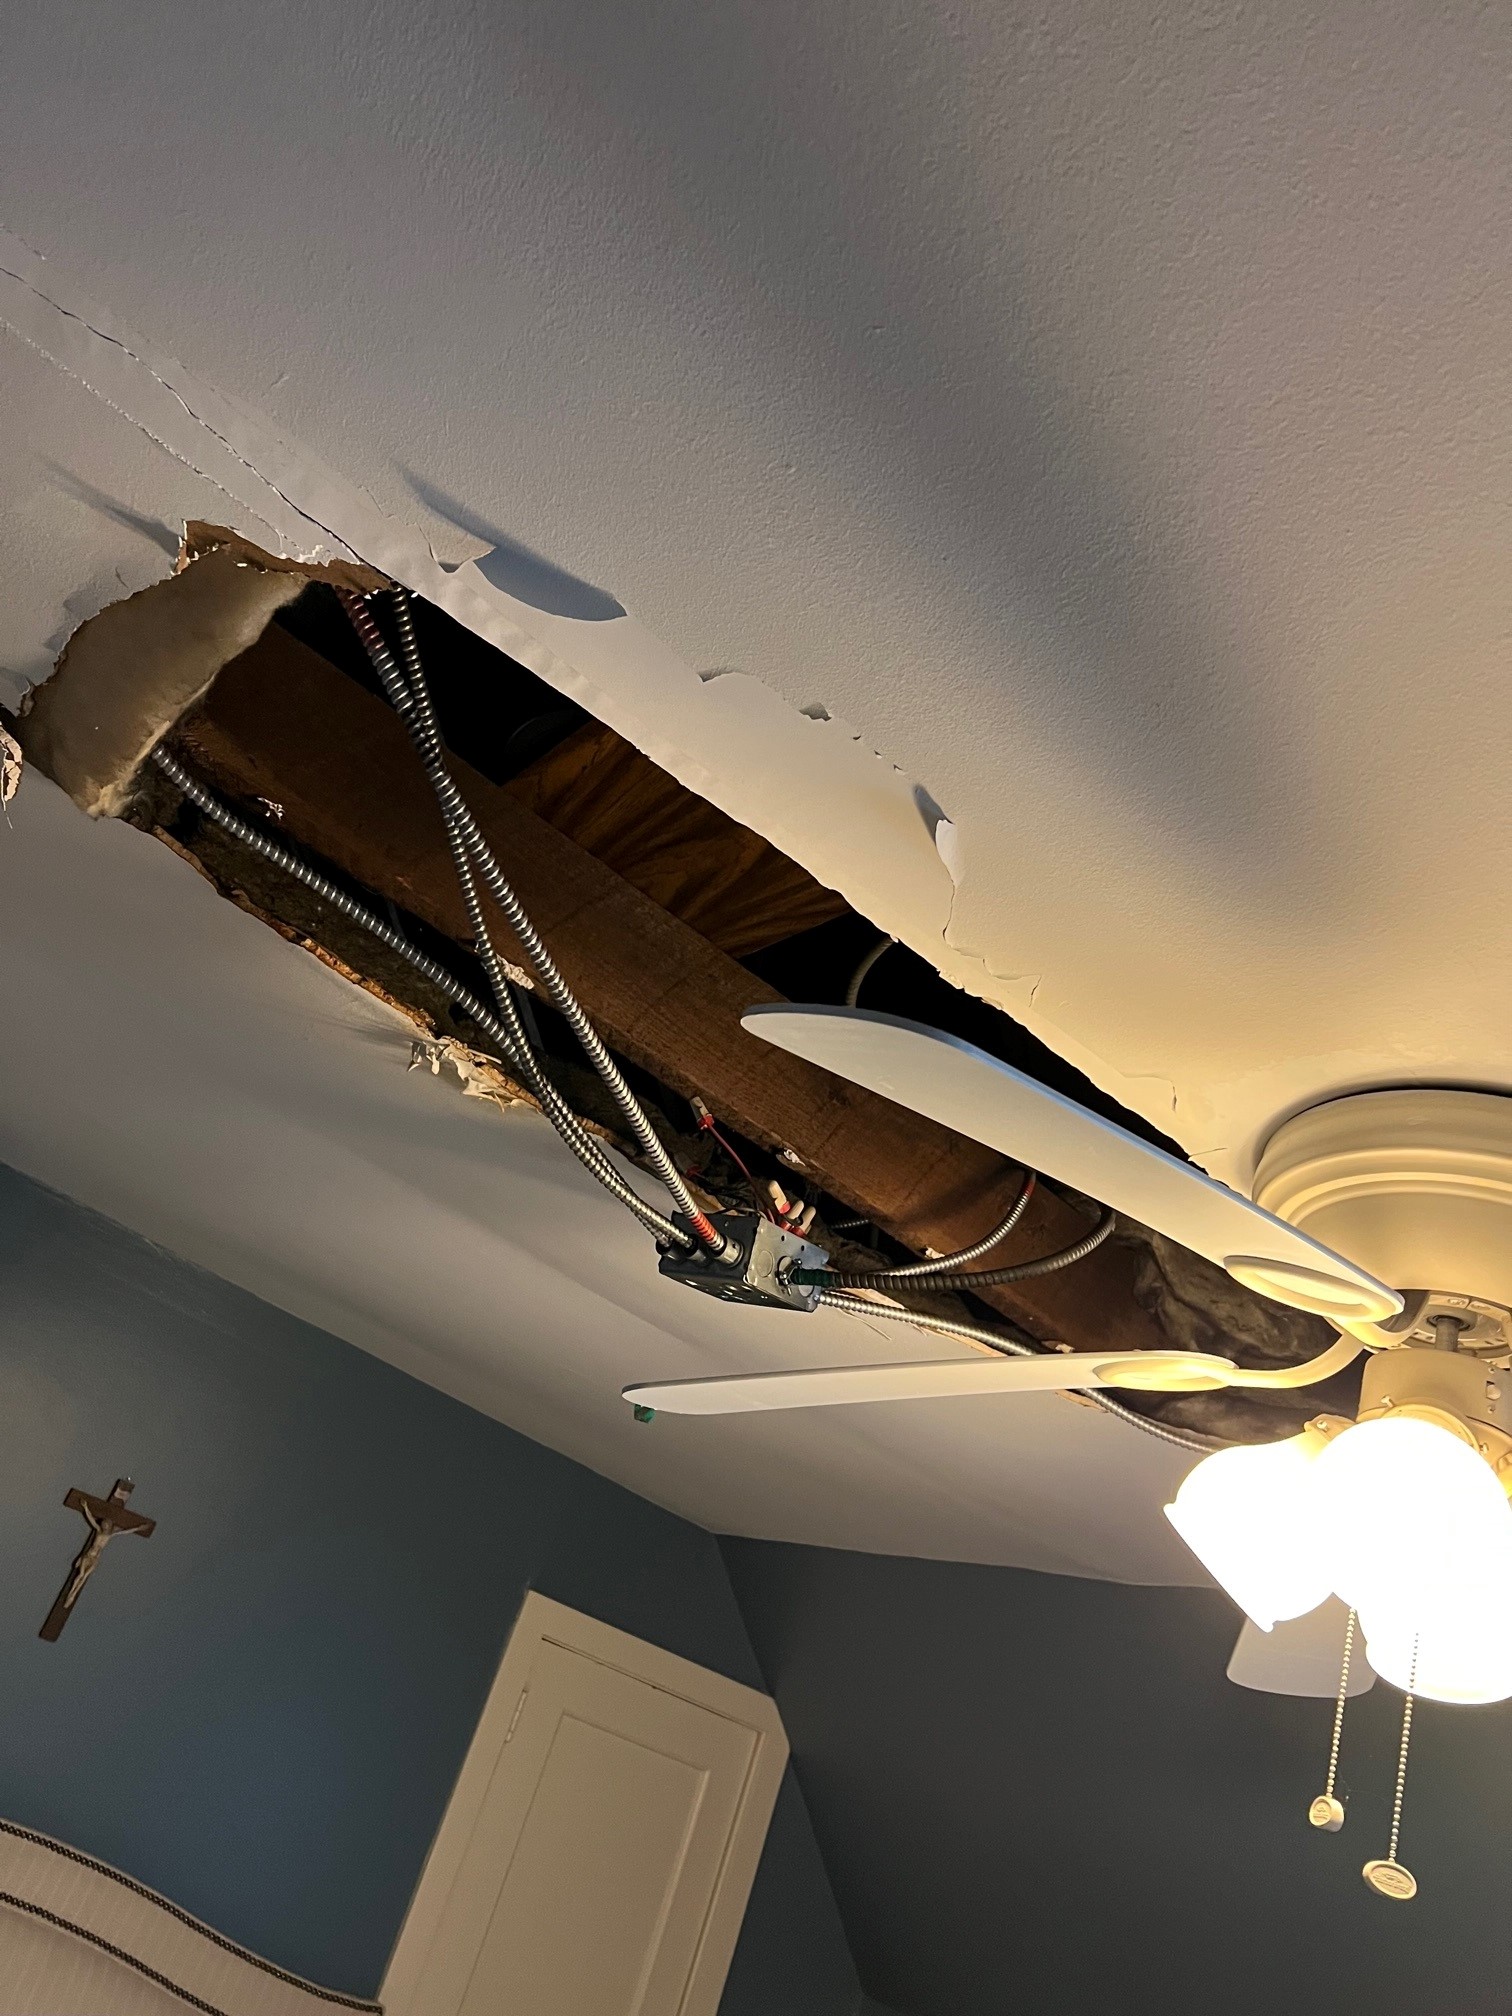
Entering through the back door, one sees the badly-damaged plaster ceiling. Approximately one year ago, an HVAC unit that is in a closet above this area failed, froze, and when it thawed, flooded, filling the ceiling with water. This was partly because that unit was not installed properly to begin with, and the tray at the bottom of it was not wide enough to catch all the water that might drip. The flood also shorted the wiring for the hanging light fixture, which is now scorched and re-wiring is needed. Thankfully, there was not an electrical fire! A drop ceiling will be installed in this area for the time being, rather than spending the much higher amount on plaster repair.
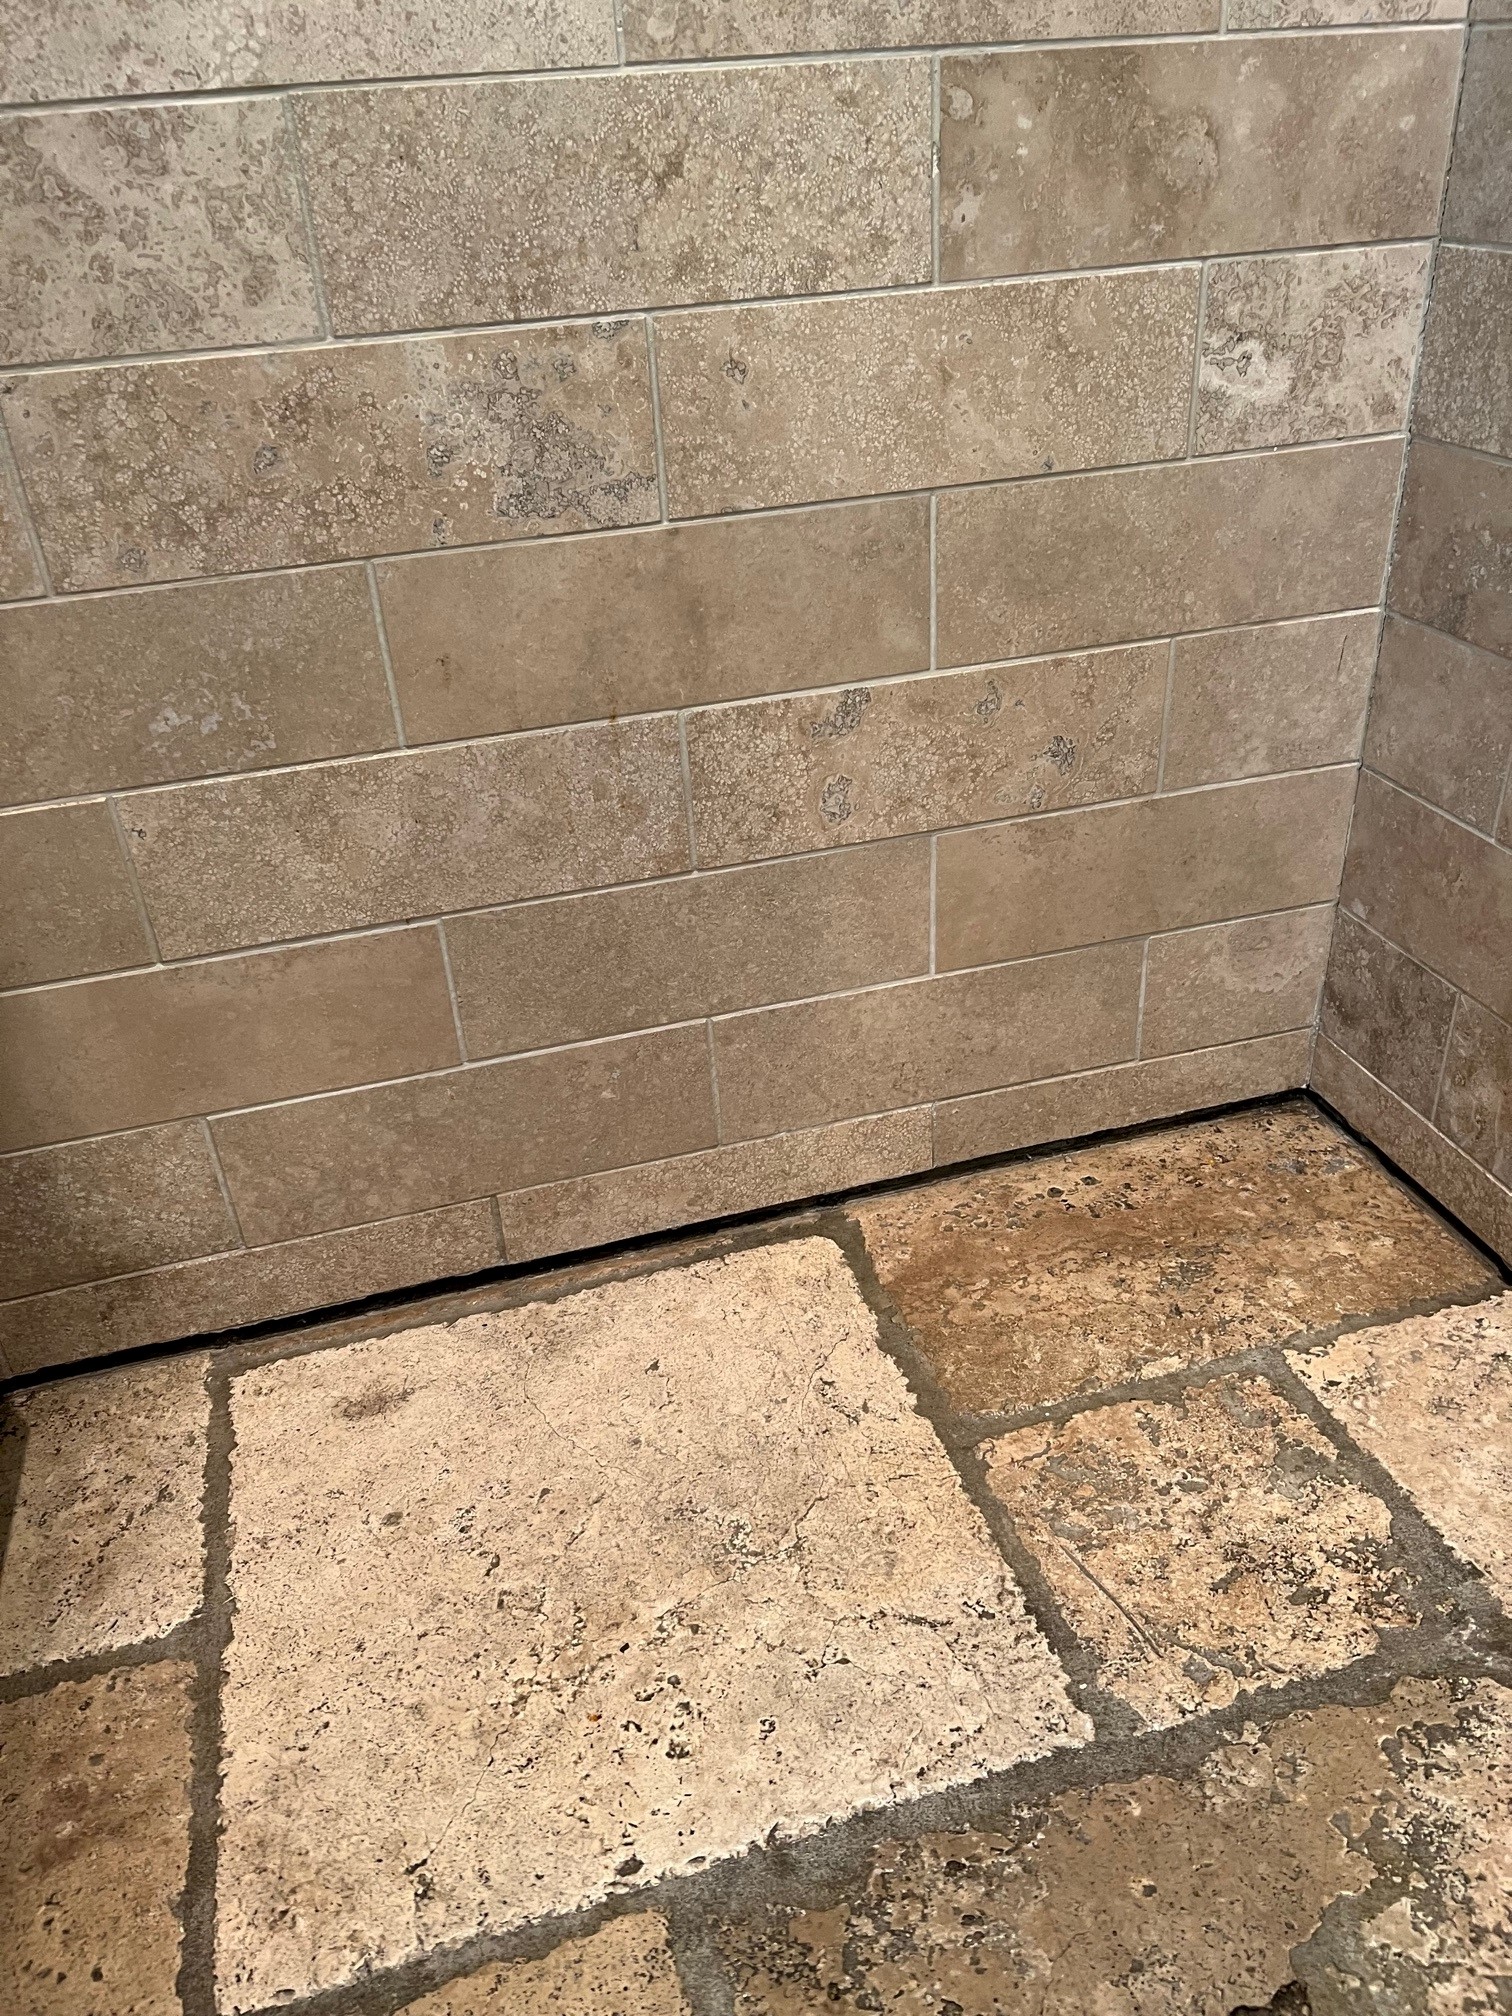
Turning into the kitchen, one can see evidence of the sill compression that is mentioned on the Priorities and Goals page. Please bear in mind that the kitchen was completely renovated about 20 years ago; already, there is a gap of over 1/2″ between the tile floor and the tile wall, because of that compression and resultant settling! Gaps are found throughout the first floor, but this is one of the more notable examples.
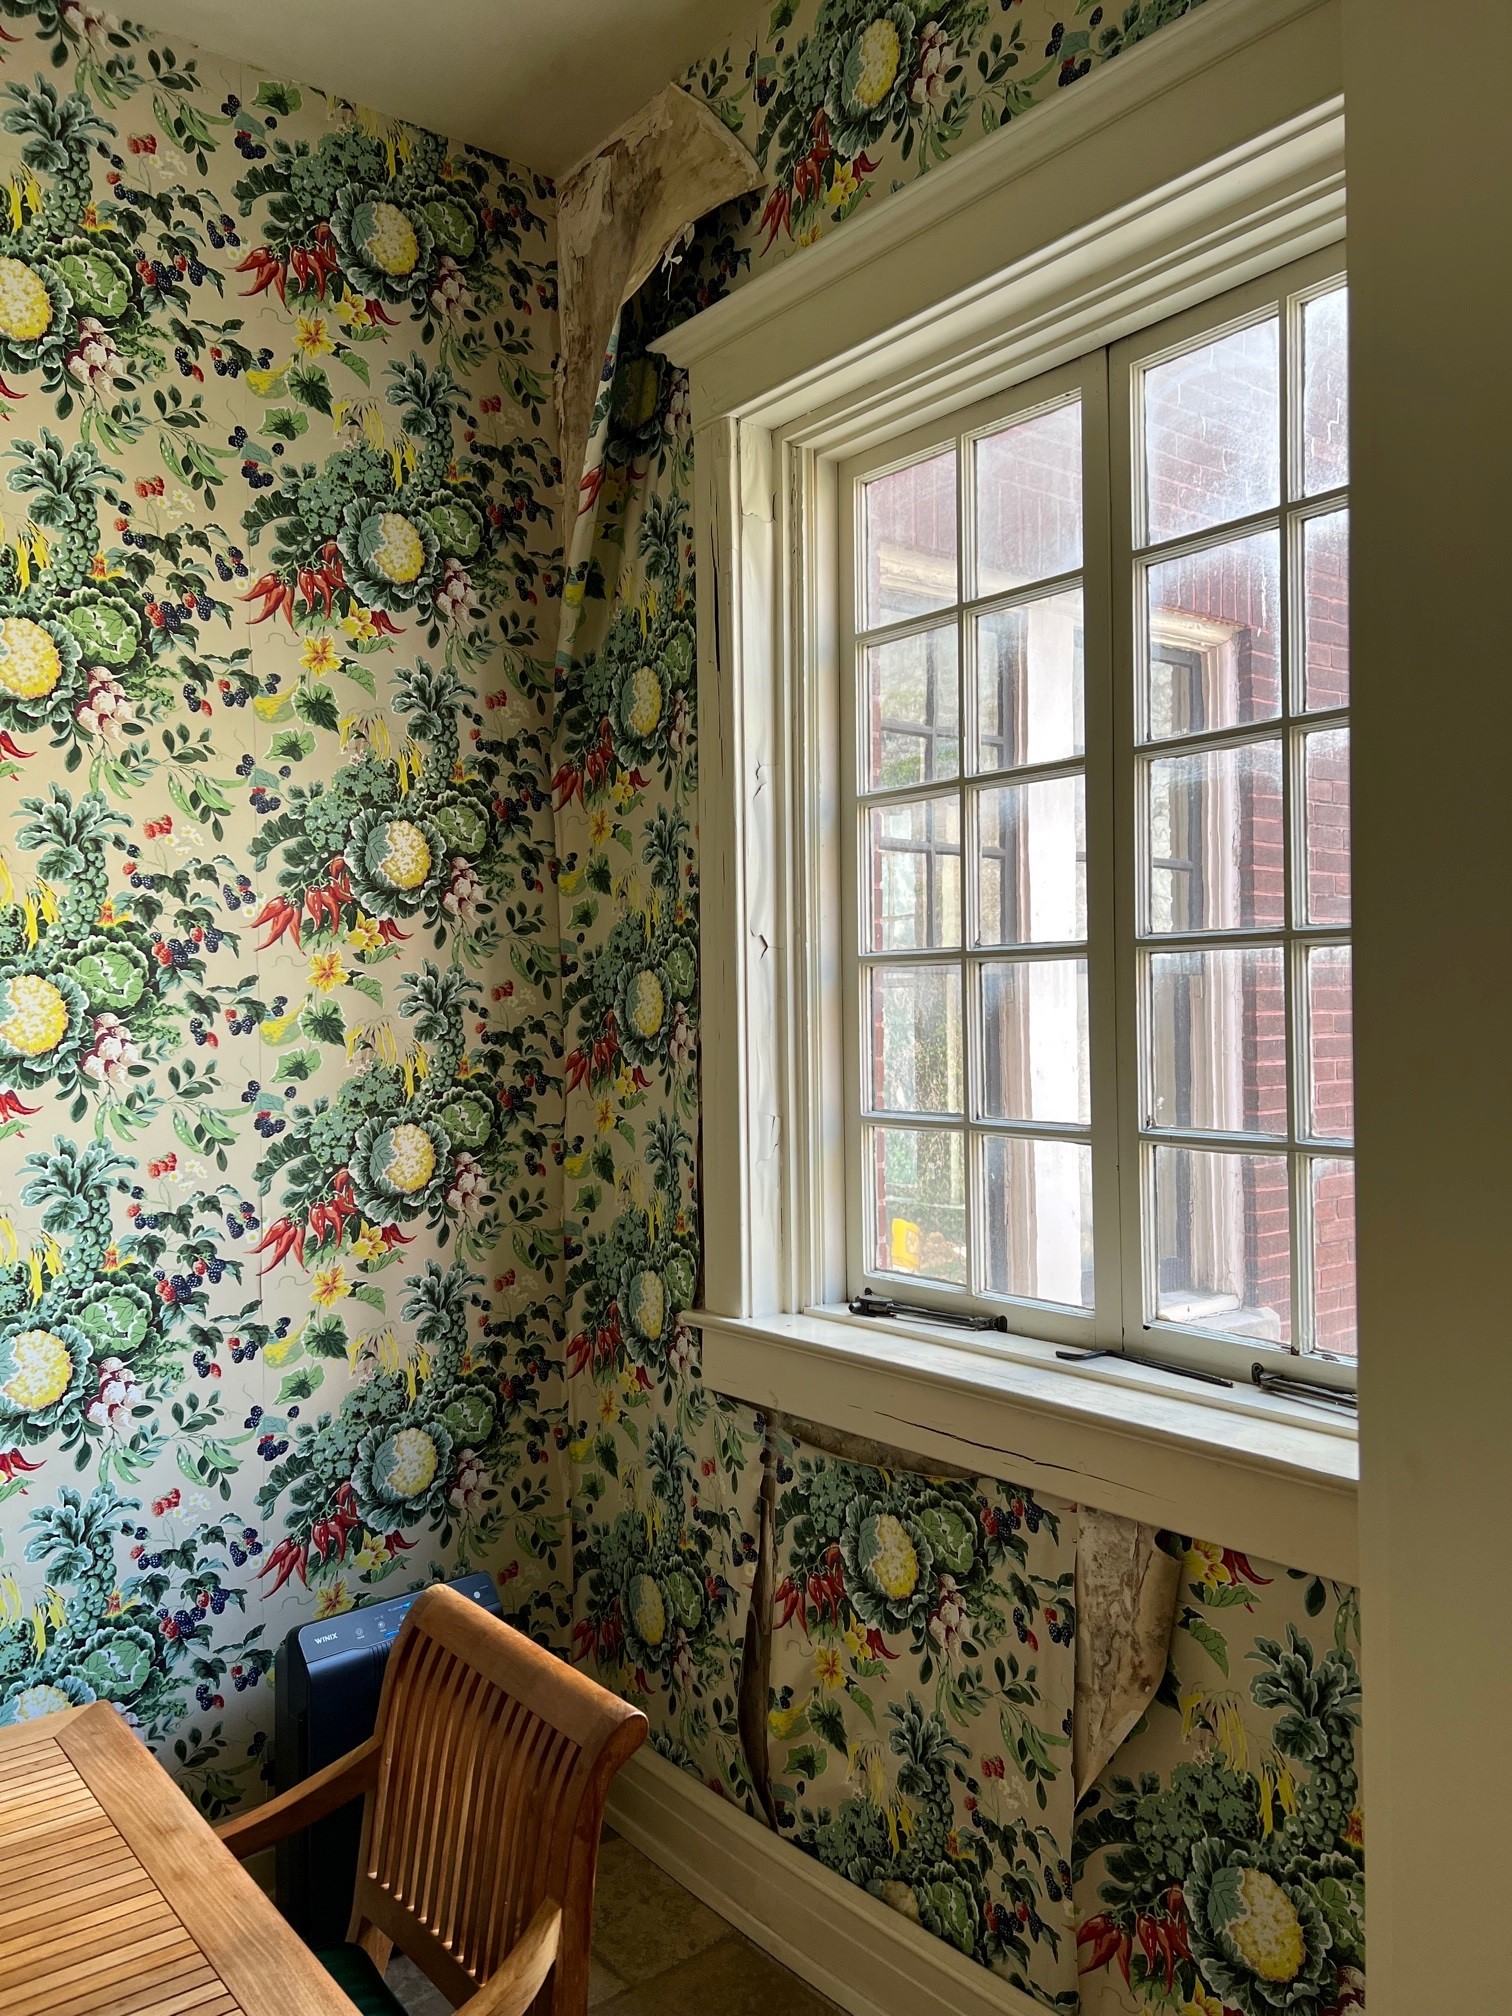
In the “breakfast nook” dining area of the kitchen, which is adjacent to the larger formal dining room and was heavily affected by the water seepage on the west side of the house, the wallpaper is falling off the wall and black mold has grown in behind it. Most of the wall paper on the wall around the window is currently held up by scotch tape. This heavy wallpaper was installed about 20 years ago. One of the 12 HEPA air filtration units that have been placed throughout the house is visible behind the chair in this photo.
Continuing, then, to the dining room, the large cracks and blistering in the plaster, that were so severe they tore through the heavy wallpaper, were caused by the water seepage on the west side. The drapes are also at end-of-life and, due to the black mold, will certainly need to be replaced. For a time, water would come in through this window during driving rains, also, and so the wood floor in this area of the dining room is damaged. There is a similar crack on the opposite side of the room – the result of a combination of major water intrusion and settling of this side of the house.
This opening in the dining room ceiling is the outcome of a major leak in the bathroom above (old plumbing). Because the exact source of the leak was not clear, and in order to be sure it had stopped, the plumber had to open the ceiling to access the pipes. Before that point, a great deal of water had come down through the chandelier and eventually through holes that the water opened in the ceiling, dripping all over the antique furniture (see below) and ruining it. The scope of Phase 1 of the Honoring Father Coyle Campaign includes patching this plaster ceiling and repairing the major plaster cracks in the dining room, but not fully remediating the wallpaper, draperies, or furniture.
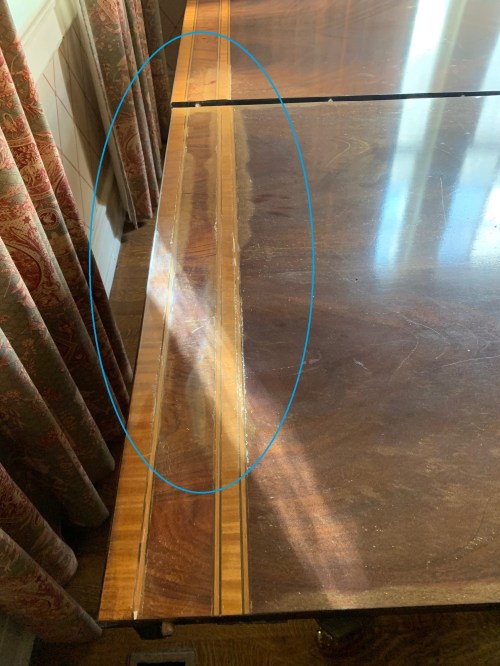
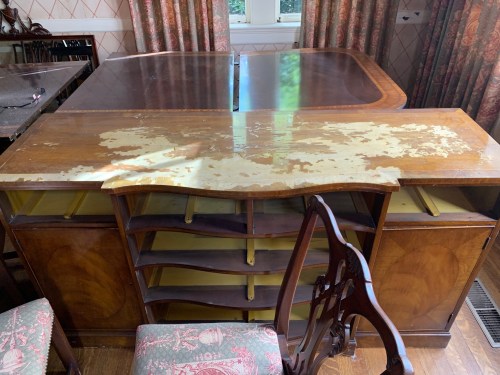
This photo of the dining room table shows a bit of the damage done by the water, which clouded the lacquer finish and got under the enamel, causing it to bubble up (notice this phenomenon especially on either side of the lighter-colored strip of wood inlay – within the blue oval). This was an antique very large table, part of a matching set that fit nicely in this room. It had been in pristine condition before the water emergency.
Even though the sideboard of the dining room set was on one side (i.e., not directly under the chandelier), it used to have a glass top on it to protect its top surface, and water got underneath it during the water emergency and cause all the lacquer and stain to peel off. Again, this piece had been in pristine condition for its age.
Moving up the back staircase to the third floor, this damage is the result of a slow but persistent leak – recall the photo above that showed the dormers, already placed closely together, with a vent pipe tucked in between them. That is basically right above where this damage is. Please note: Phase 1 does not include a provision for fixing damage like this.
This is the collapsed ceiling in a third floor bedroom – due to persistent water intrusion and also due, in part, to the poor quality of the build-out on the third floor (one problem is that thinner-than-normal sheetrock was used). The discovery of this problem was providential: when Fr. Adams moved in, Fr. Jerabek quickly relocated to this room, in order to give Fr. Adams access to a certain suite on the second floor for his living quarters. Shortly after Fr. Jerabek started sleeping in the bed that is right under this ceiling, he woke up one night to water dripping on his legs. If he had not moved up here, the problem would have continued probably for quite a while without anyone noticing (because the mattress and bedding would have been absorbing it!), and a far worse outcome might have occurred. We were at least able to go in the area above the ceiling and put buckets up. But – the ceiling was already sagging due to the poor construction quality, and the water was the final nail in the coffin, so to speak. Not long after Fr. Jerabek moved out of this room, the ceiling collapsed! Please note: Phase 1 of the campaign does not include any provision for fixing this problem – but the photo is provided to show how extensive the damage is.
Back outside in the driveway area, the “Carriage House” (behind the parked vehicles) has served many purposes over the years, from being a sort of storage shed (as it has been most recently), to a residence for a gardener, to a parish gift shop. In any case, the building is in very bad shape at present. It will be removed to provide for much-needed additional parking and also to make it possible for a driveway to be added that will exit onto Third Avenue North in the future.
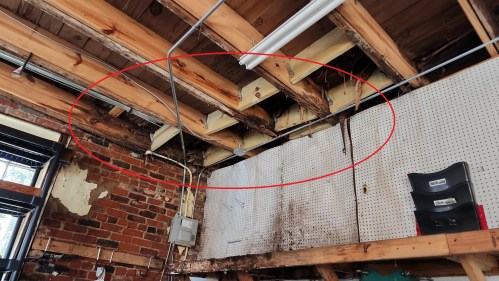
Among the many problems with the “Carriage House” is that the roof is in imminent danger of collapse, due to severe rotting of the ceiling joists (within the red circle). The “sunken” flat roof on this building pools water and causes it to enter inside the building every time it rains.
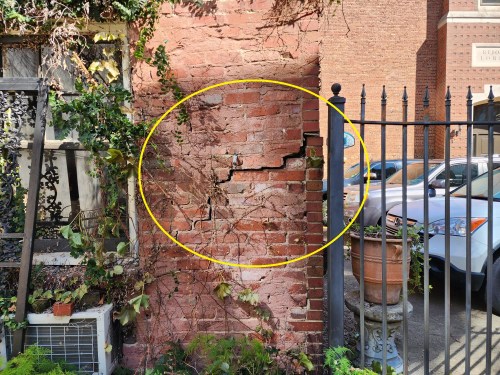
There are other issues with the structural integrity of the “Carriage House”, such as very large cracks in the masonry (within the yellow circle) indicative of settling and other disintegration.